Don't miss our holiday offer - up to 20% OFF!

Looking for christmas nail designs that feel festive and easy to wear? You do not need a salon visit to get a polished holiday look. A clear plan, two colours, and a steady hand are enough for most of the ideas below.
This guide gives you 20 designs, from classic red and green and gold to snowflakes, glitter, candy cane stripes, reindeer, plaid, burgundy, rose gold, and soft nude with gold stars. Each one lists a difficulty level, the time it takes, the best nail length, and one tip that fits that design only. Pick the one that matches your outfit and your plans.
What you need
You do not need a full kit. Gather these before you start.
- Base coat and top coat
- Two main colours for your chosen design
- A dotting tool or a clean toothpick
- A thin brush for lines and small shapes
- Glitter, stickers, or small gems, only if your design uses them
- Cotton pads and nail polish remover for clean ups
Work on a clean, dry nail. Paint two thin coats of colour instead of one thick coat, and let each coat dry before you add the next layer.
Before you start: pick your design in 5 minutes
A quick plan saves time and stops that half finished feeling.
- Pick one design, not three. Choose the design below that matches your Christmas outfit and your nail length. A design that suits short nails may not suit long nails.
- Pick two colours and one finish. For example: red and gold with glitter, green and gold with shine, or nude and gold with stars. Repeat those colours on your nails and one accessory, such as a ring or bracelet.
- Start with a base coat. A clear base coat protects your nails and helps the colour last longer. Then add two thin coats of colour, not one thick coat.
- Keep one accent nail. If a design feels too much on all ten nails, paint it on one or two accent nails and keep the rest in a plain colour from the same palette.
1. Classic Red
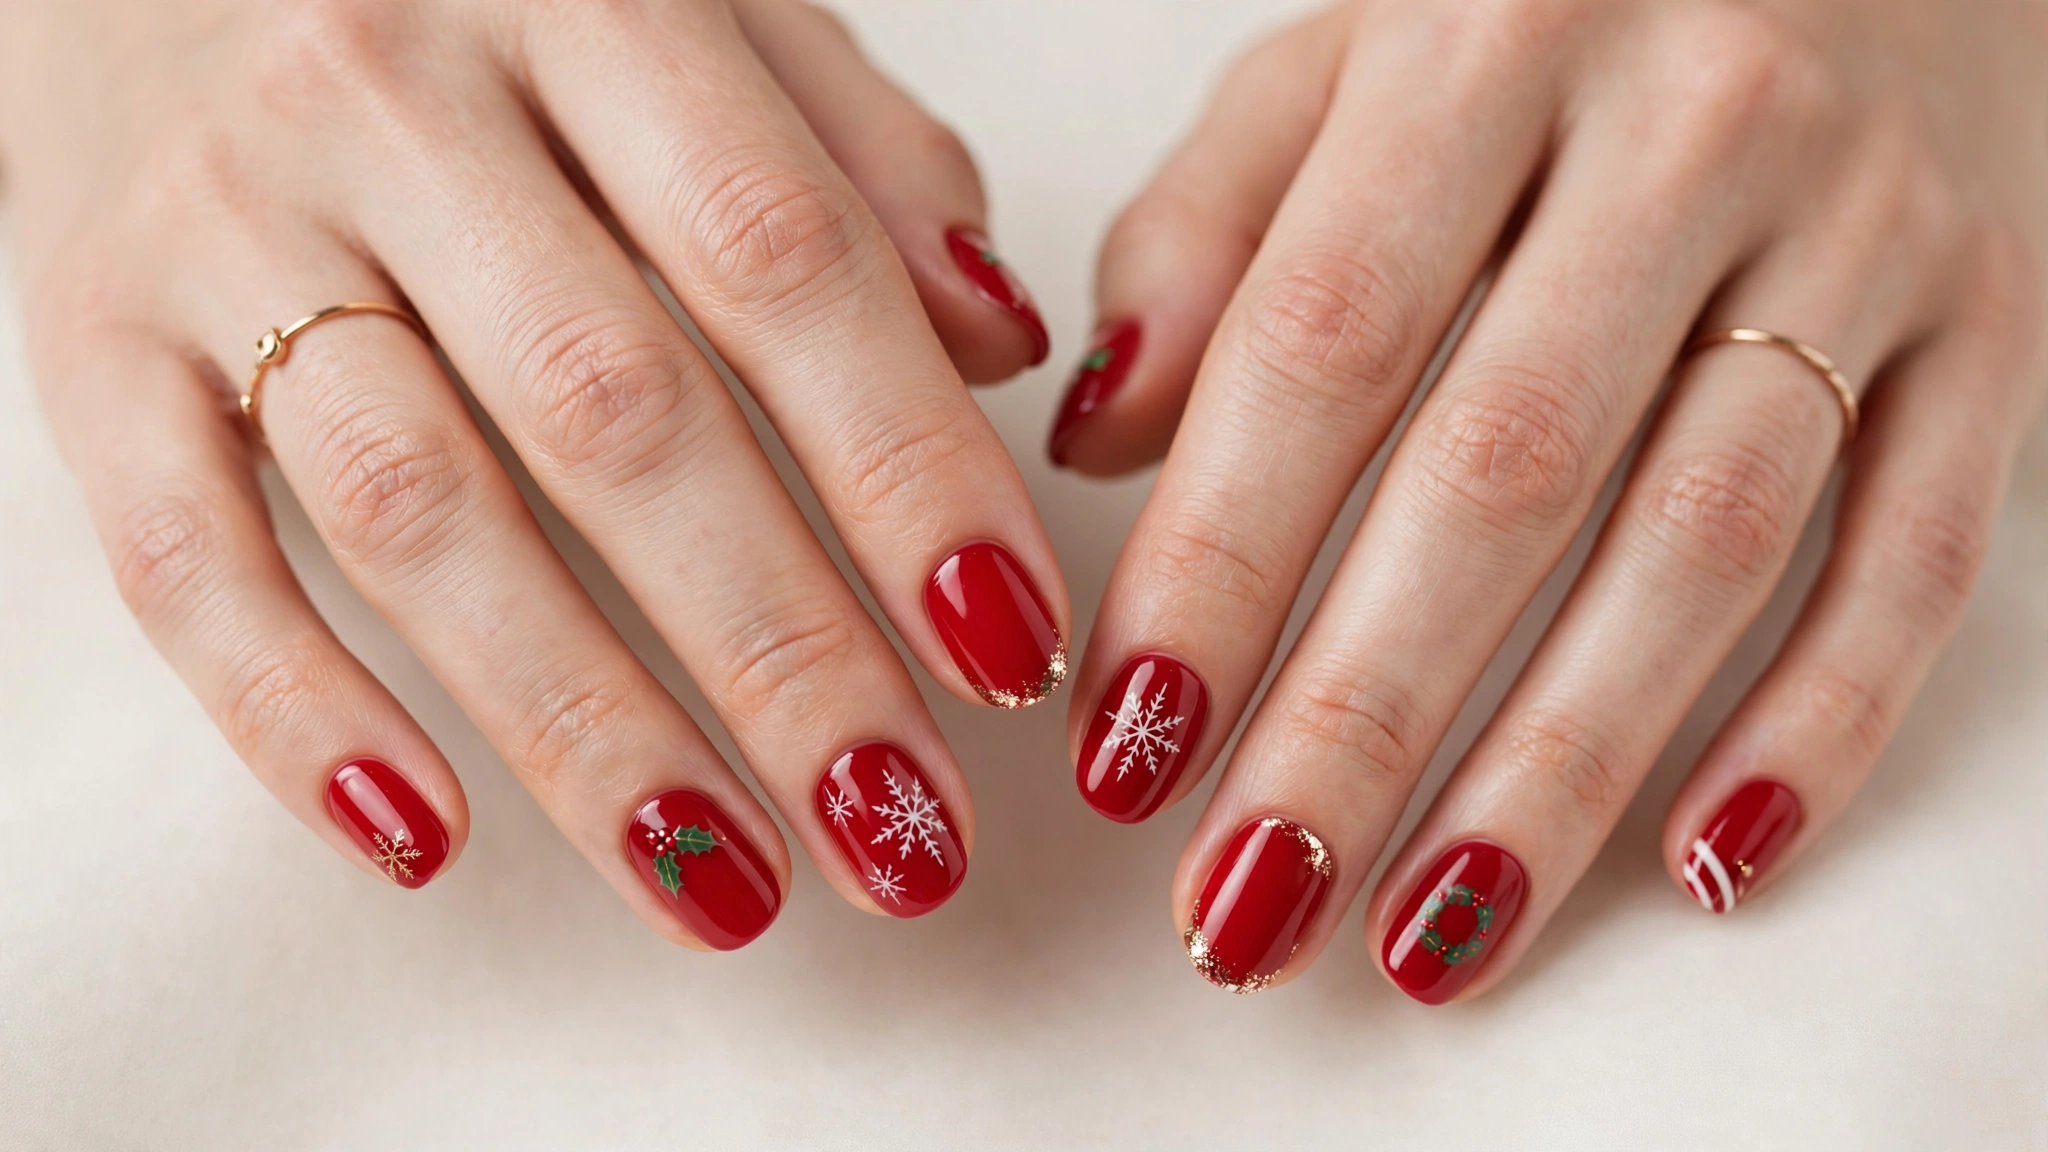
Difficulty: Easy. Time: about 15 minutes. Best nail length: short to medium. Best for: Christmas Day dinner.
Use a deep glossy red on all ten nails. When the colour is dry, add one small white snowflake on the ring finger with a dotting tool. Keep the other nails plain, because the clean red is the point of this look. If your hands shake, paint the snowflake with a sticker instead. It still looks neat from a normal distance.
2. Green and Gold
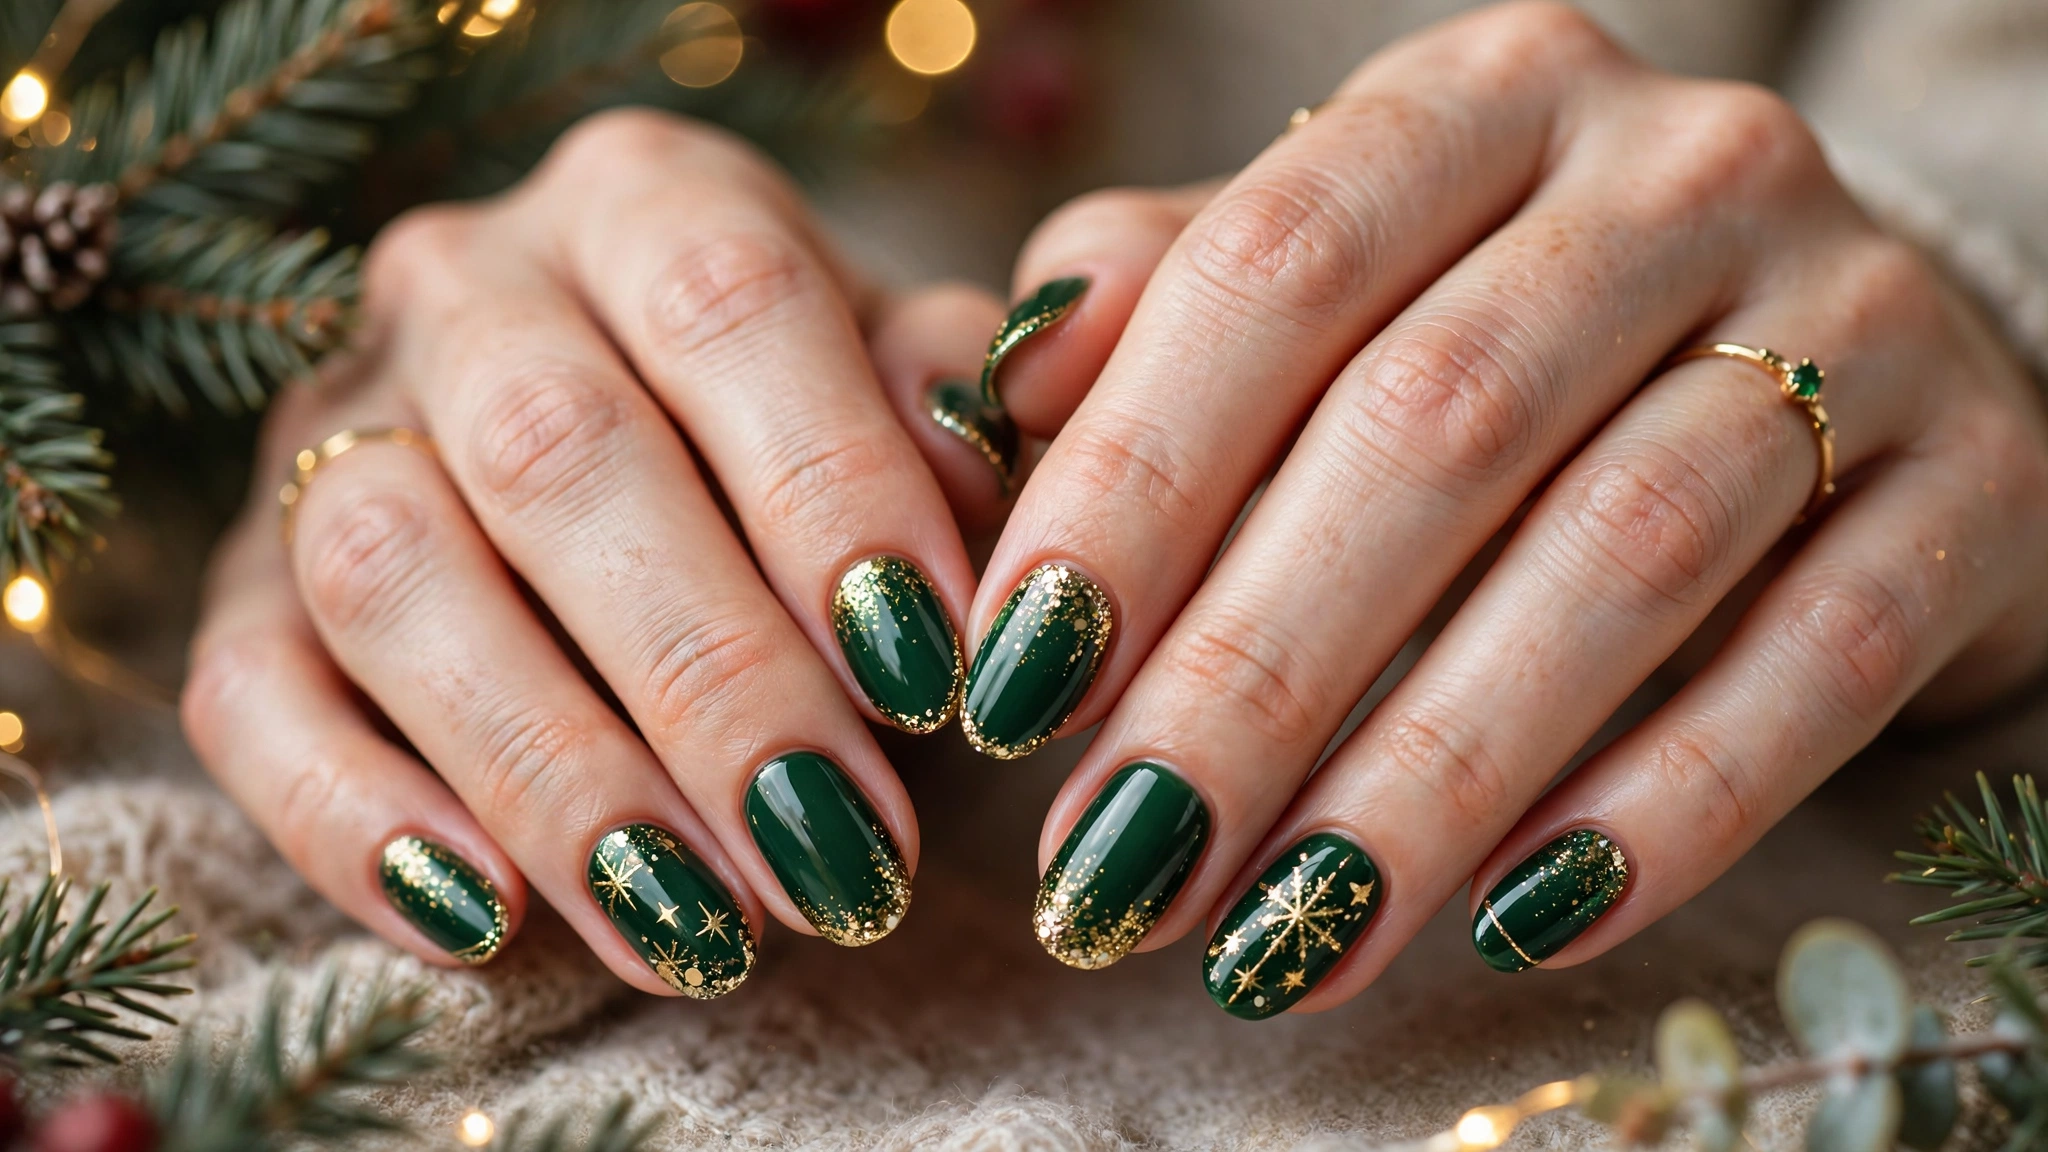
Difficulty: Medium. Time: about 25 minutes. Best nail length: medium. Best for: a Christmas party.
Start with a deep green base, then press gold glitter onto the tips while the second coat is still slightly tacky. Add one small gold star on the ring finger. A useful tip here is to paint the glitter only on the top third of the nail, so the green still shows and the finish does not look heavy. Pair it with gold jewellery and a dark outfit.
3. White Snowflake
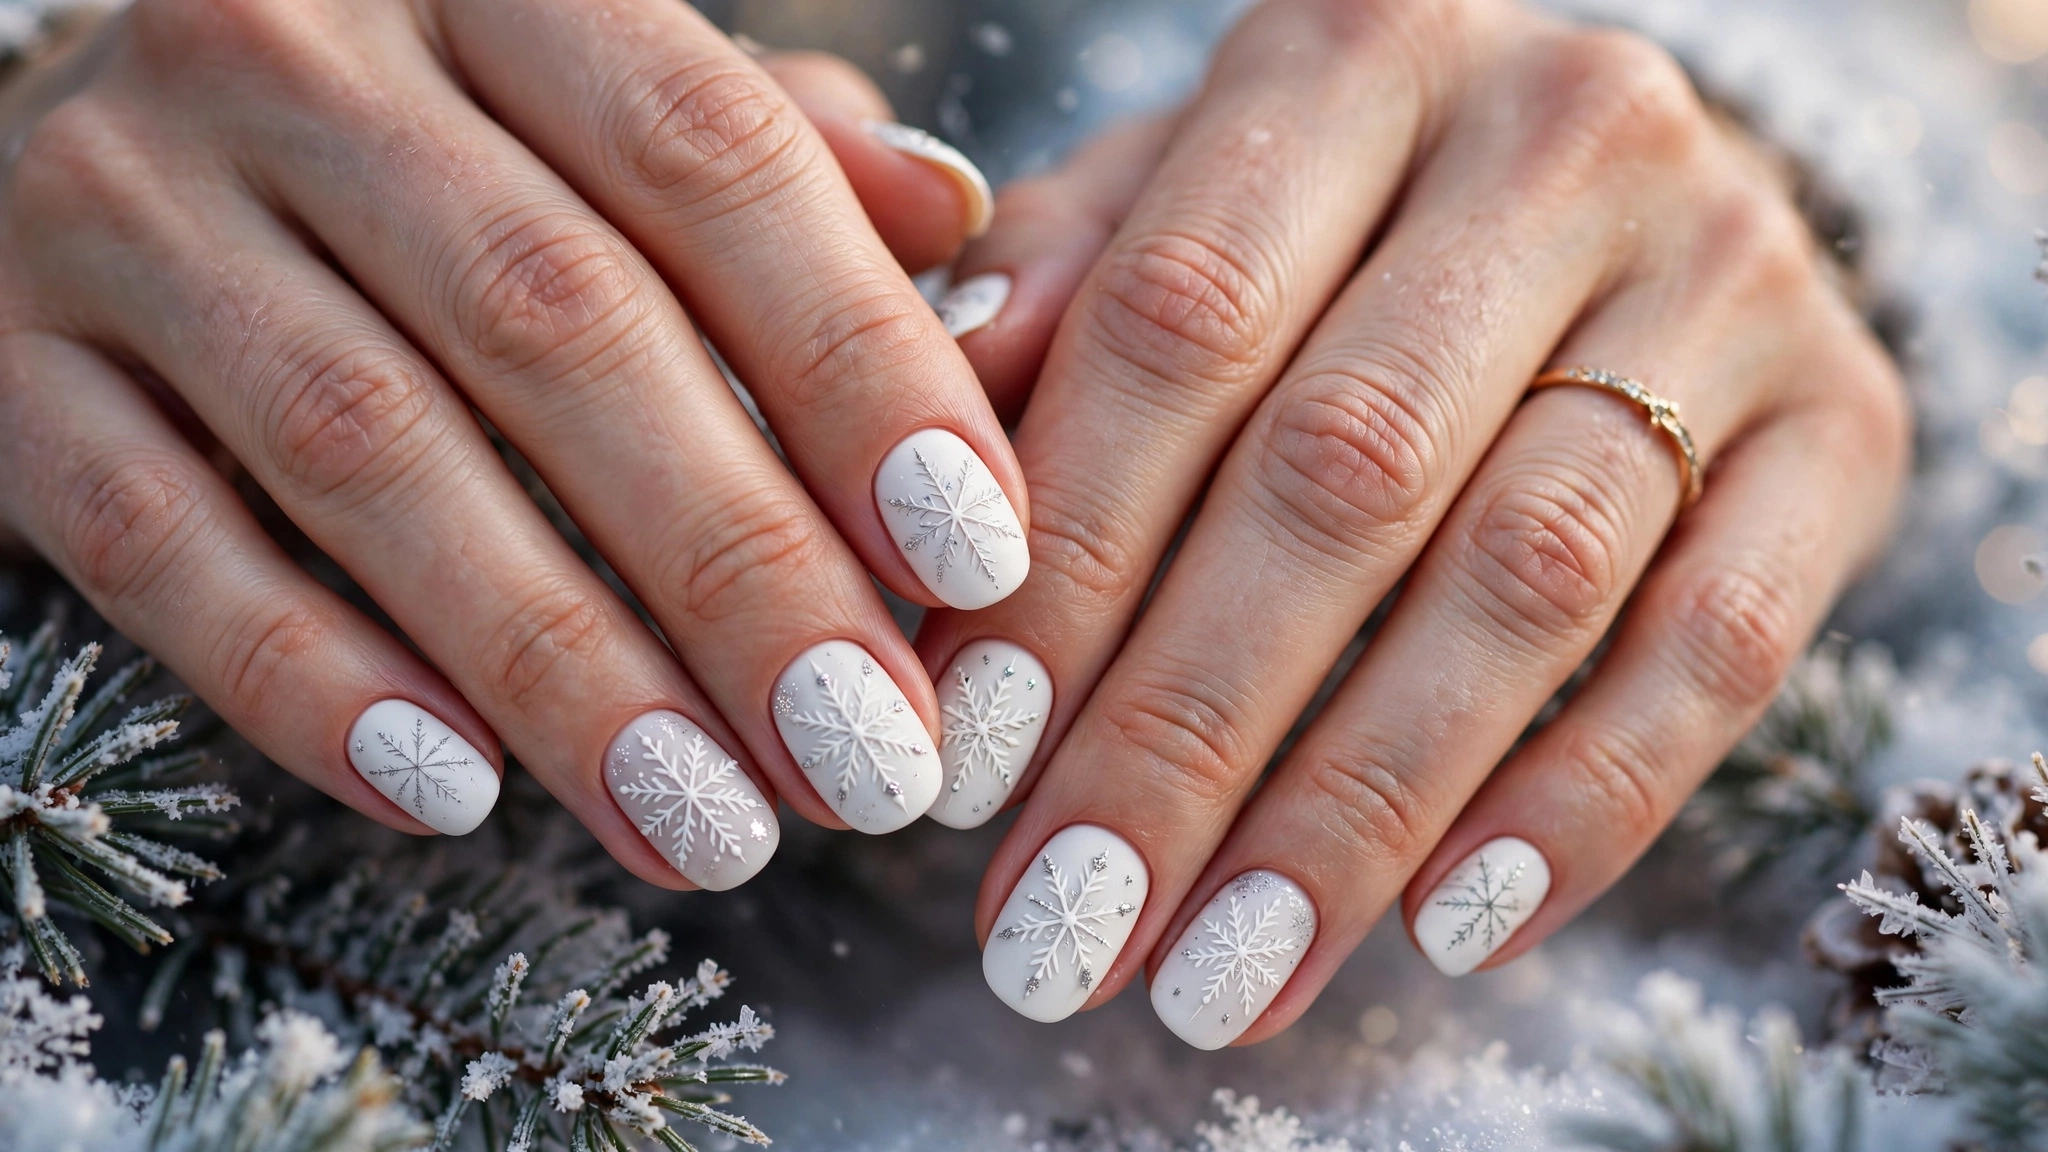
Difficulty: Easy. Time: about 20 minutes. Best nail length: short to medium. Best for: a snowy daytime look.
Paint a soft white base and let it dry fully. Draw one snowflake on the ring finger with a thin brush, using short straight lines that cross in the centre. Add a tiny silver dot where the lines meet. Leave the other nails plain white. If you want a little shine, add silver glitter only at the tips, and stop there.
4. Silver Glitter
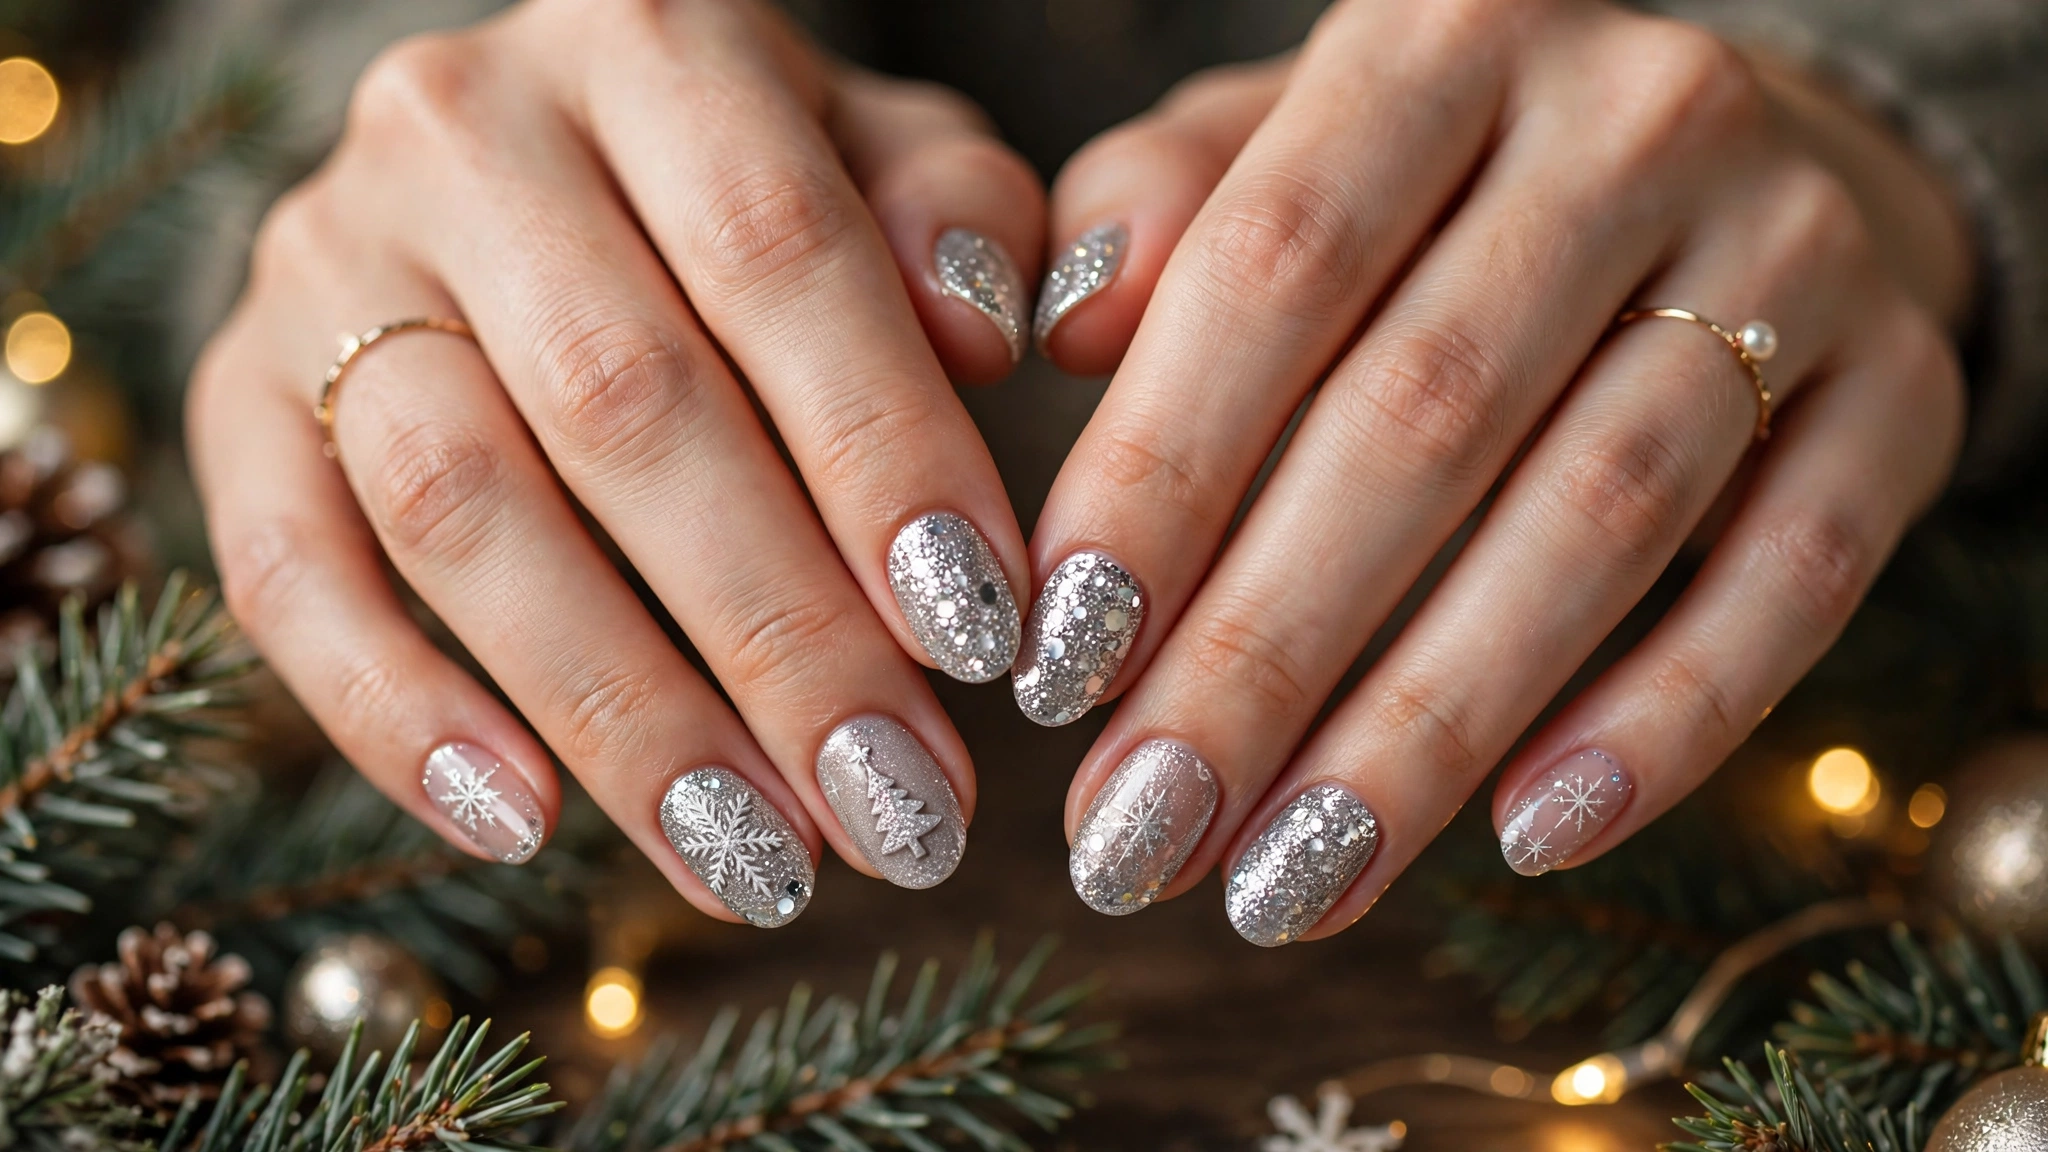
Difficulty: Easy. Time: about 15 minutes. Best nail length: any length. Best for: a New Year evening.
This one is about shine, not art. Paint a soft nude base on most nails and cover two accent nails fully in silver glitter. Press the glitter on in a thin layer, then seal it with top coat, because loose glitter will catch on clothes. A small snowflake sticker on one glitter nail is enough. No extra drawing is needed.
5. Gold French Tips
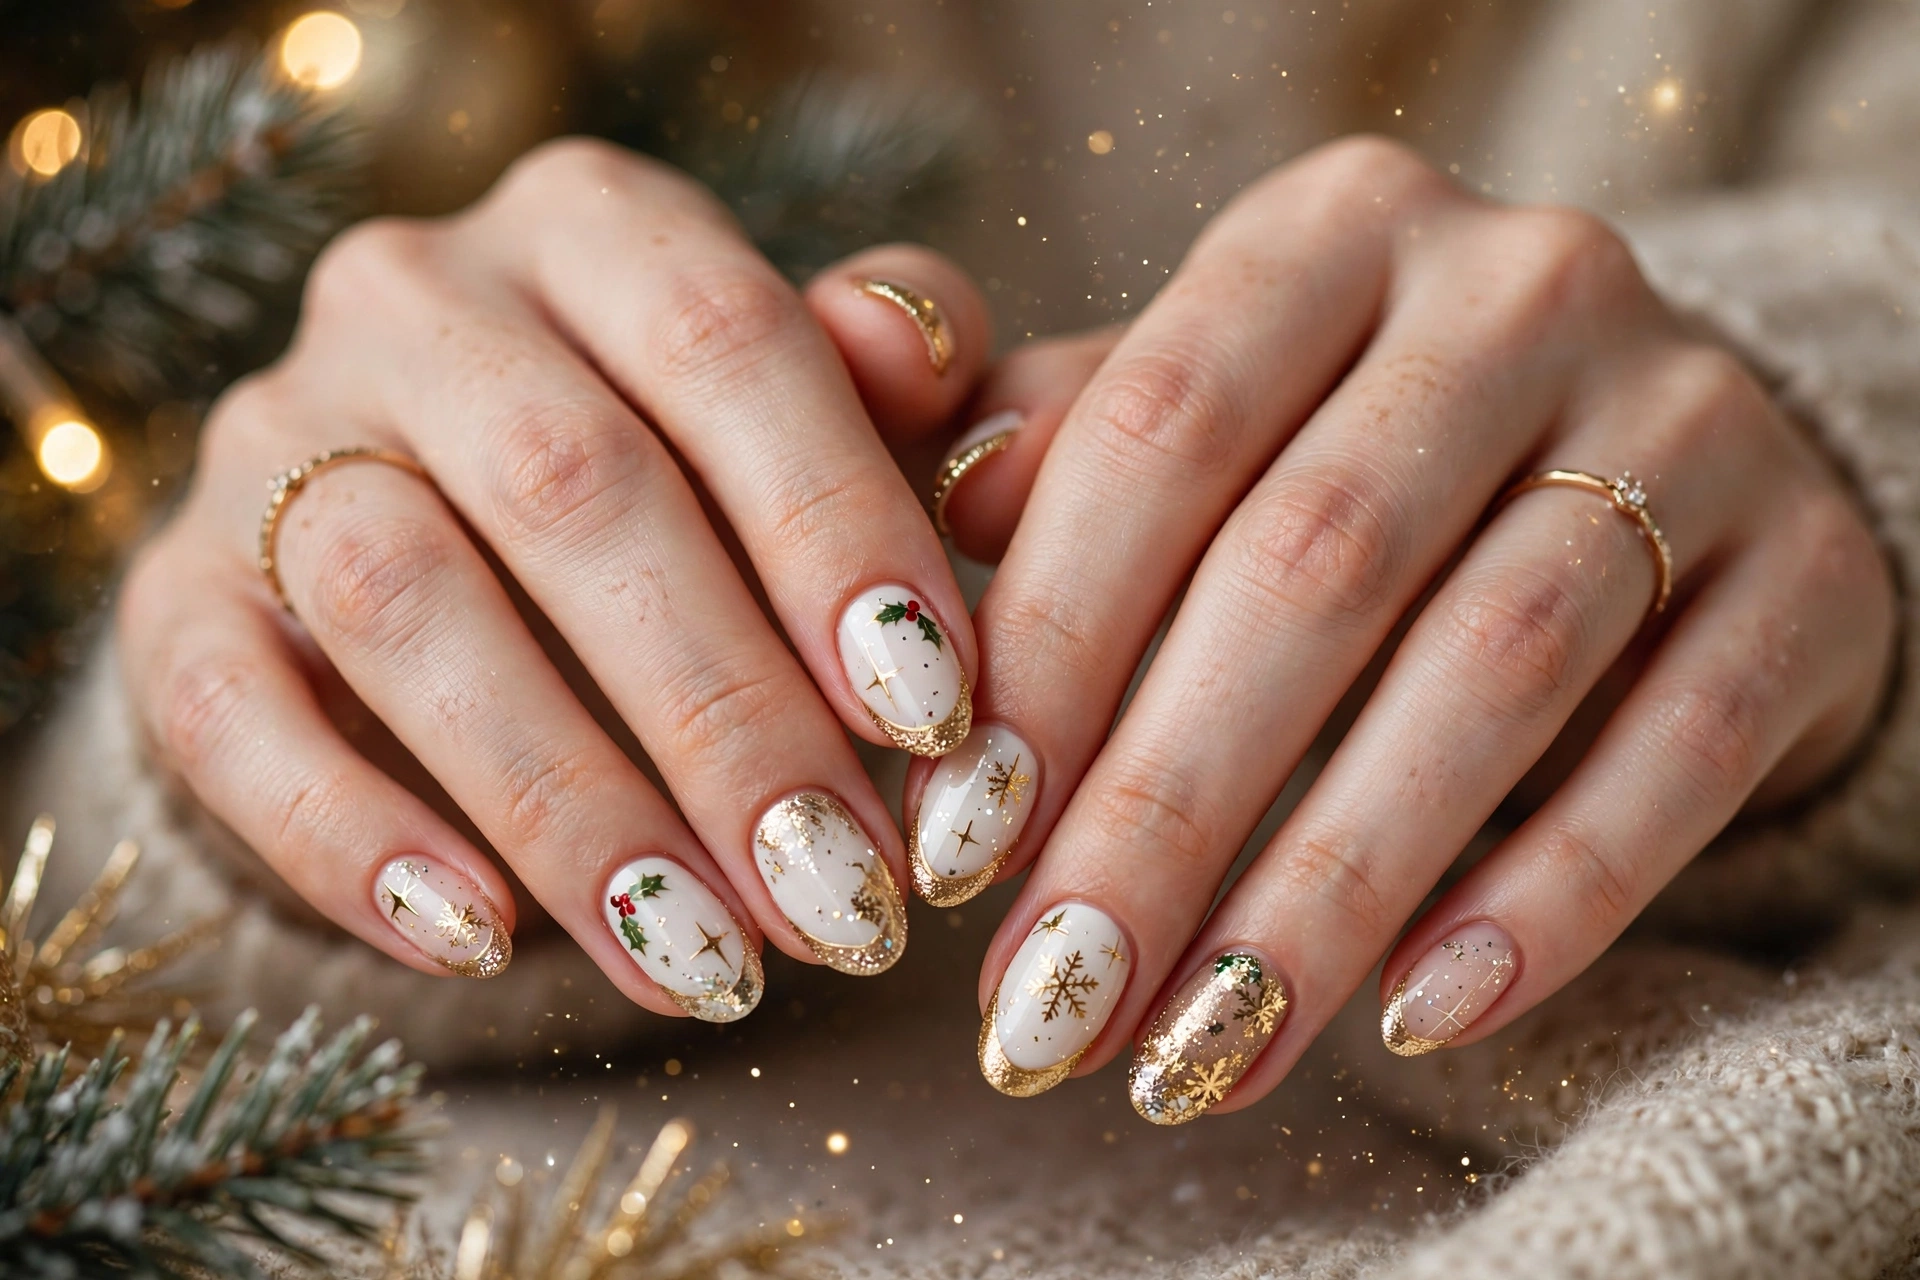
Difficulty: Medium. Time: about 25 minutes. Best nail length: medium to long. Best for: work and family gatherings.
Paint a nude base first. When it is dry, paint the tips in gold glitter, following the natural curve of each nail. If the line looks uneven, clean the edge with a thin brush dipped in remover. Add one tiny gold star on the ring finger. This design suits almost any outfit, and it still looks neat after two or three days.
6. Candy Cane Stripes
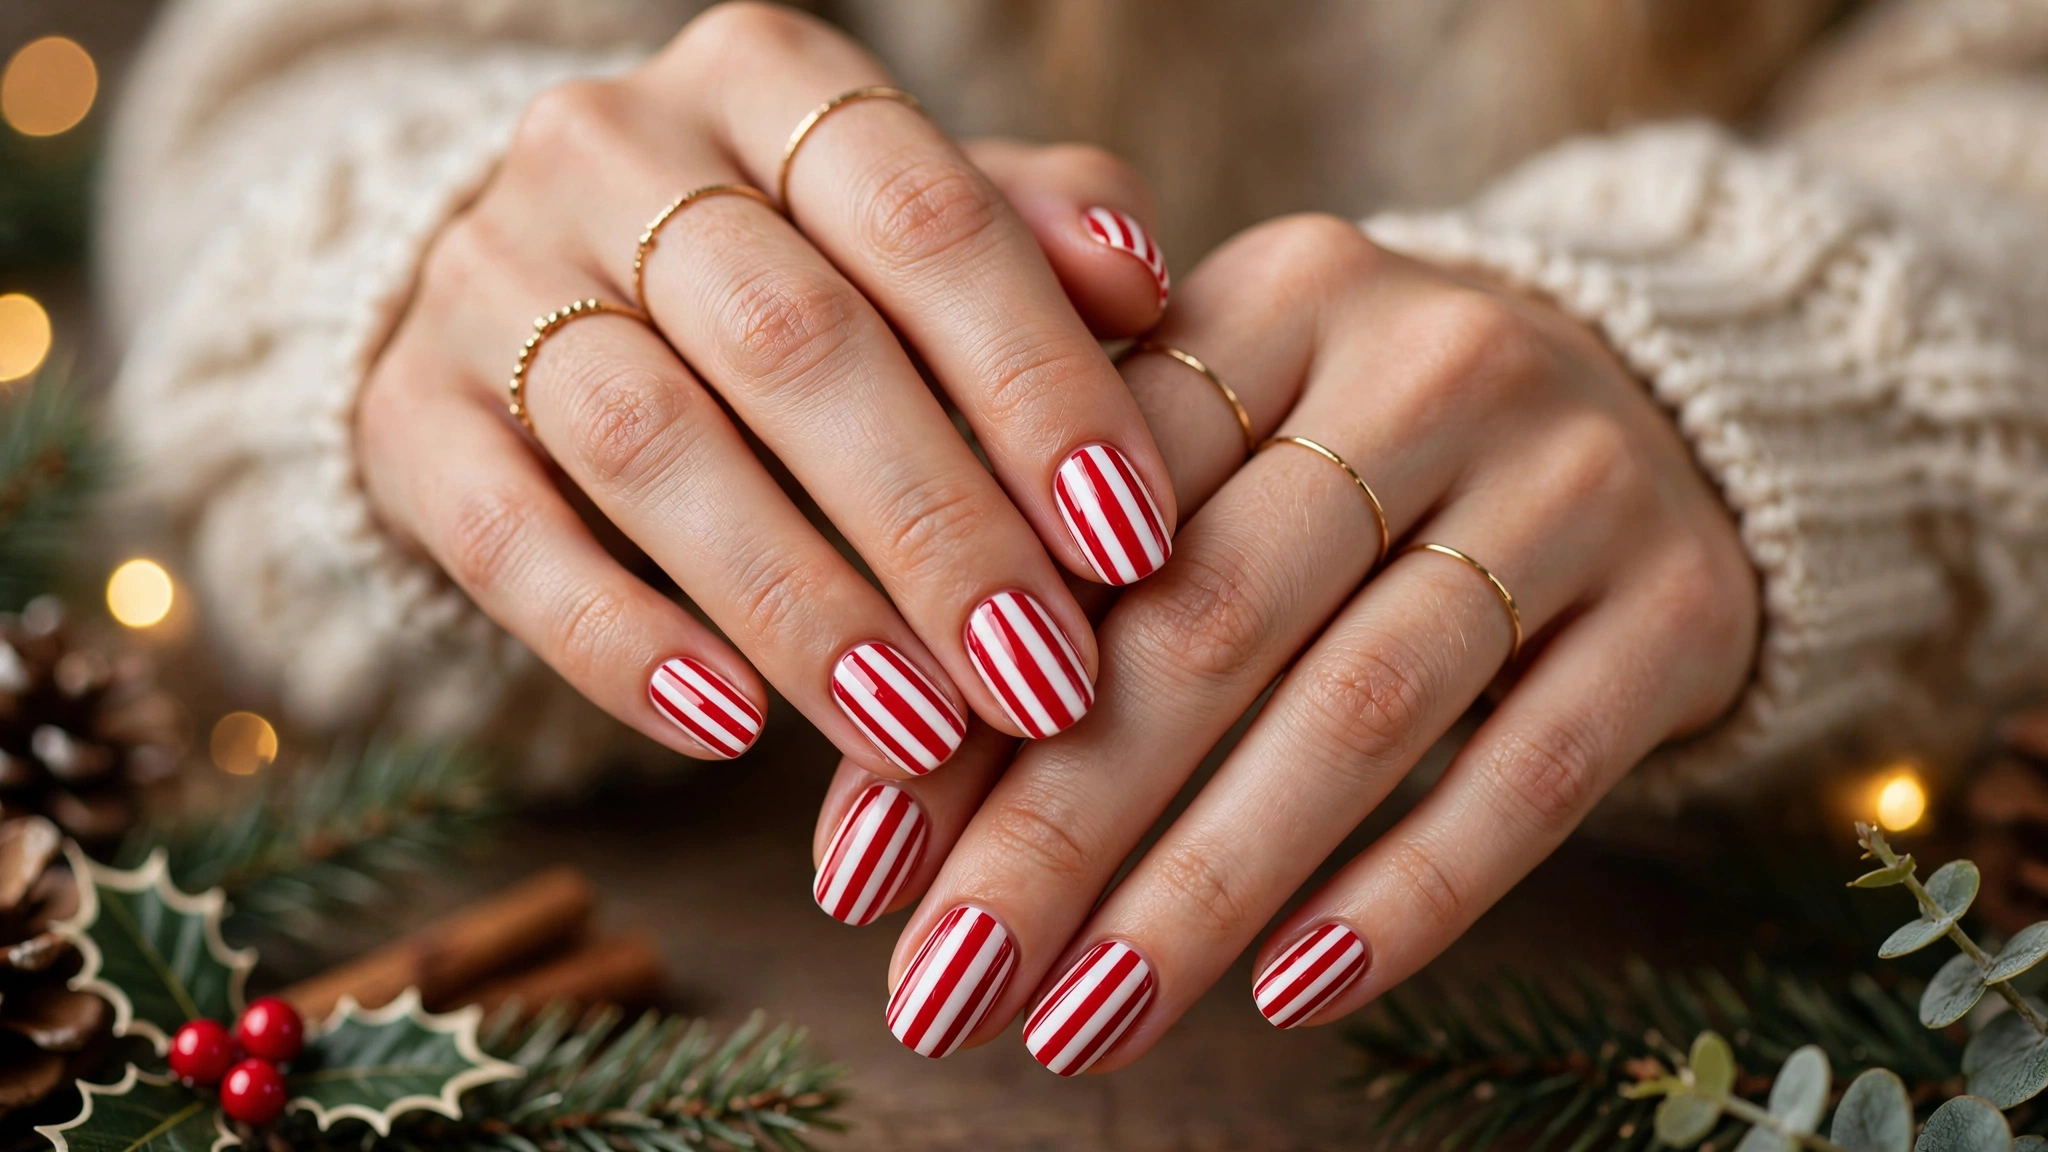
Difficulty: Advanced. Time: about 35 minutes. Best nail length: medium to long. Best for: a fun family party.
Paint a white base, then draw diagonal red stripes with a thin brush. The trick is to keep the stripes the same width, so practise one nail first and use that as your guide. Do stripes on two accent nails only, and keep the rest plain red, so the look stays cheerful instead of busy. Finish with a clear top coat for shine.
7. Christmas Tree Accent
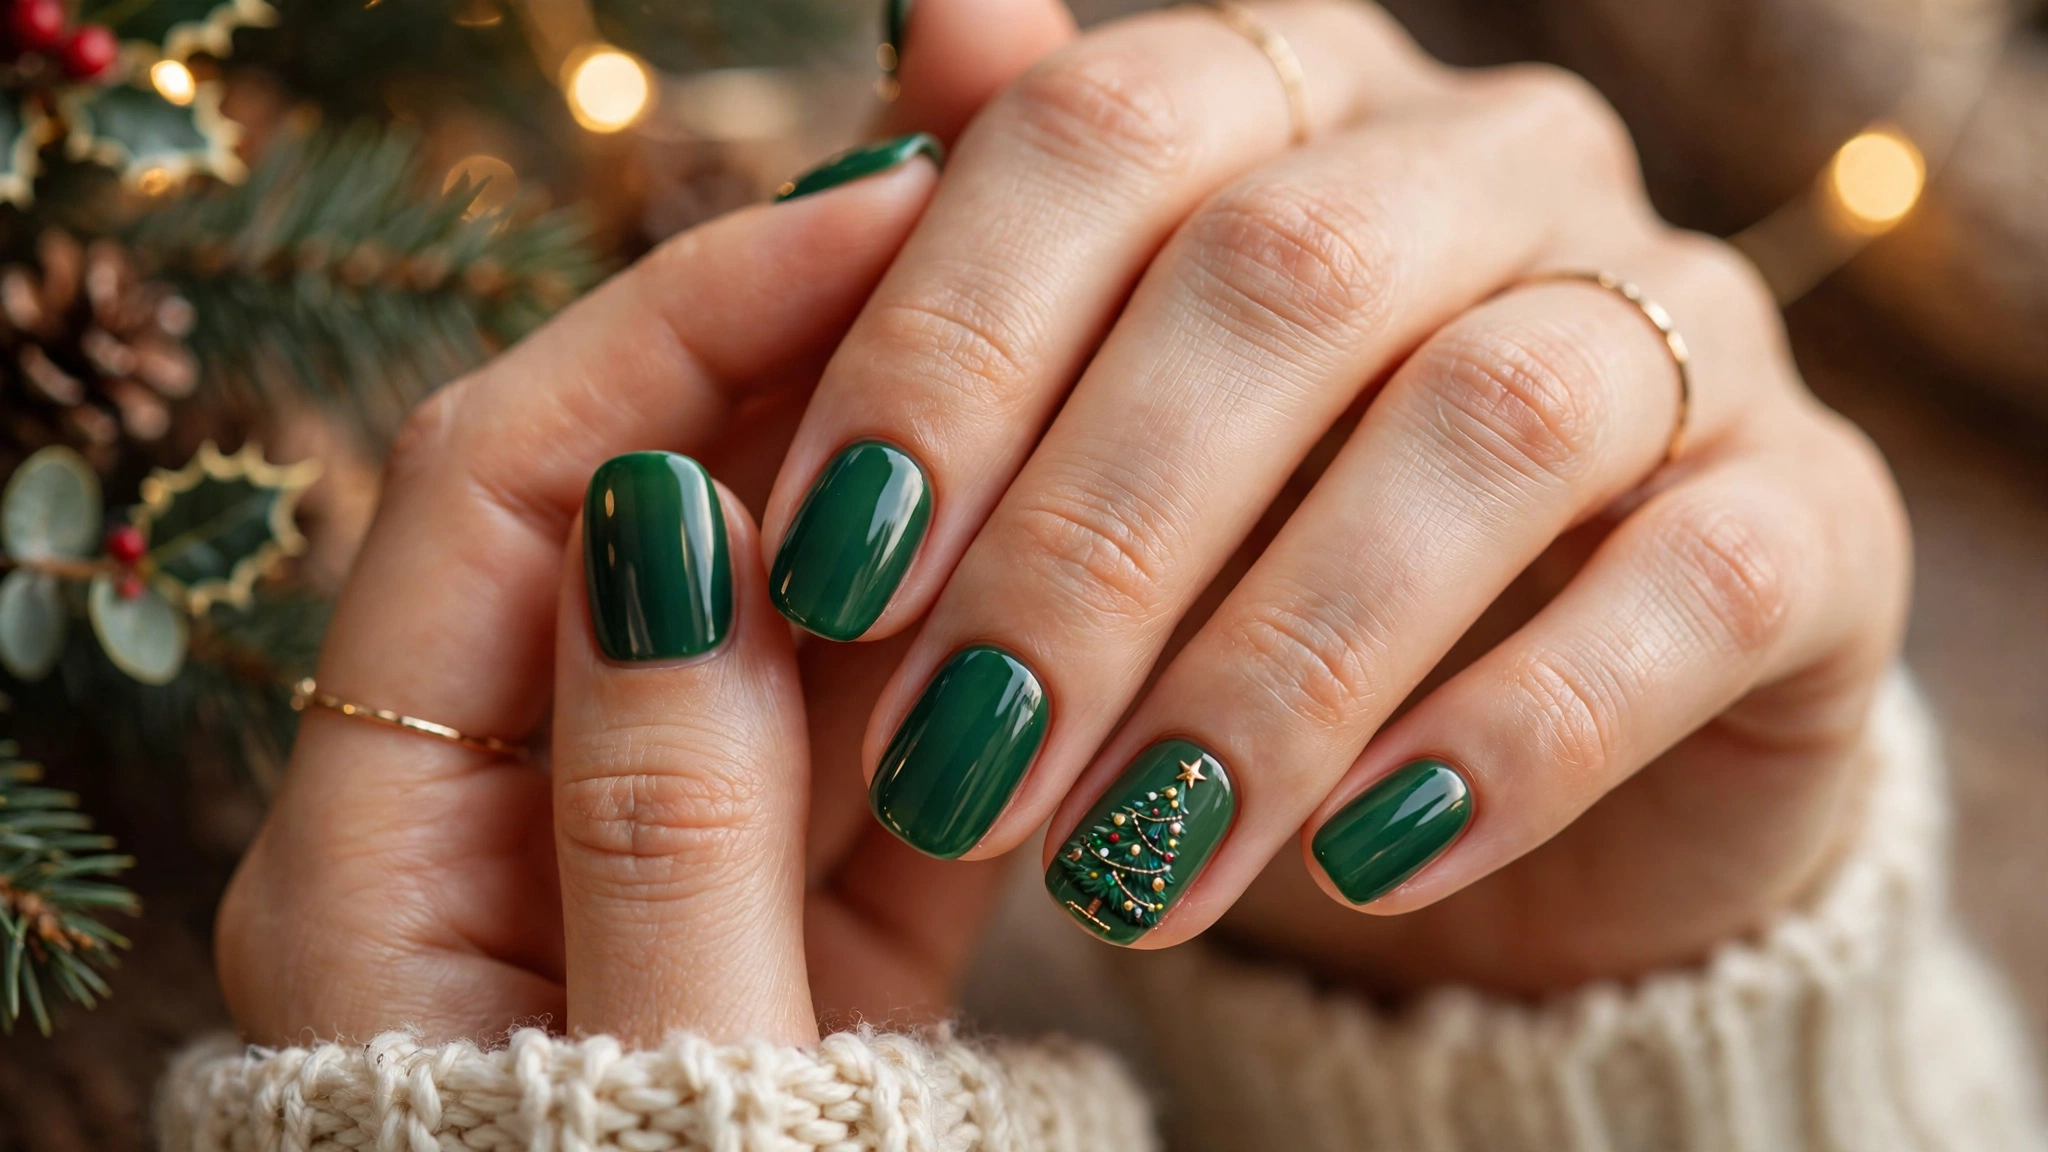
Difficulty: Advanced. Time: about 30 minutes. Best nail length: medium. Best for: Christmas Day.
Paint a deep green base on all nails. On the ring finger, draw a small tree with three short horizontal lines that get shorter toward the top, then add tiny gold dots as baubles and a gold star at the top. Let each line dry for a minute before you add the next, or the green will smudge. Keep the other nails plain green and glossy.
8. Reindeer
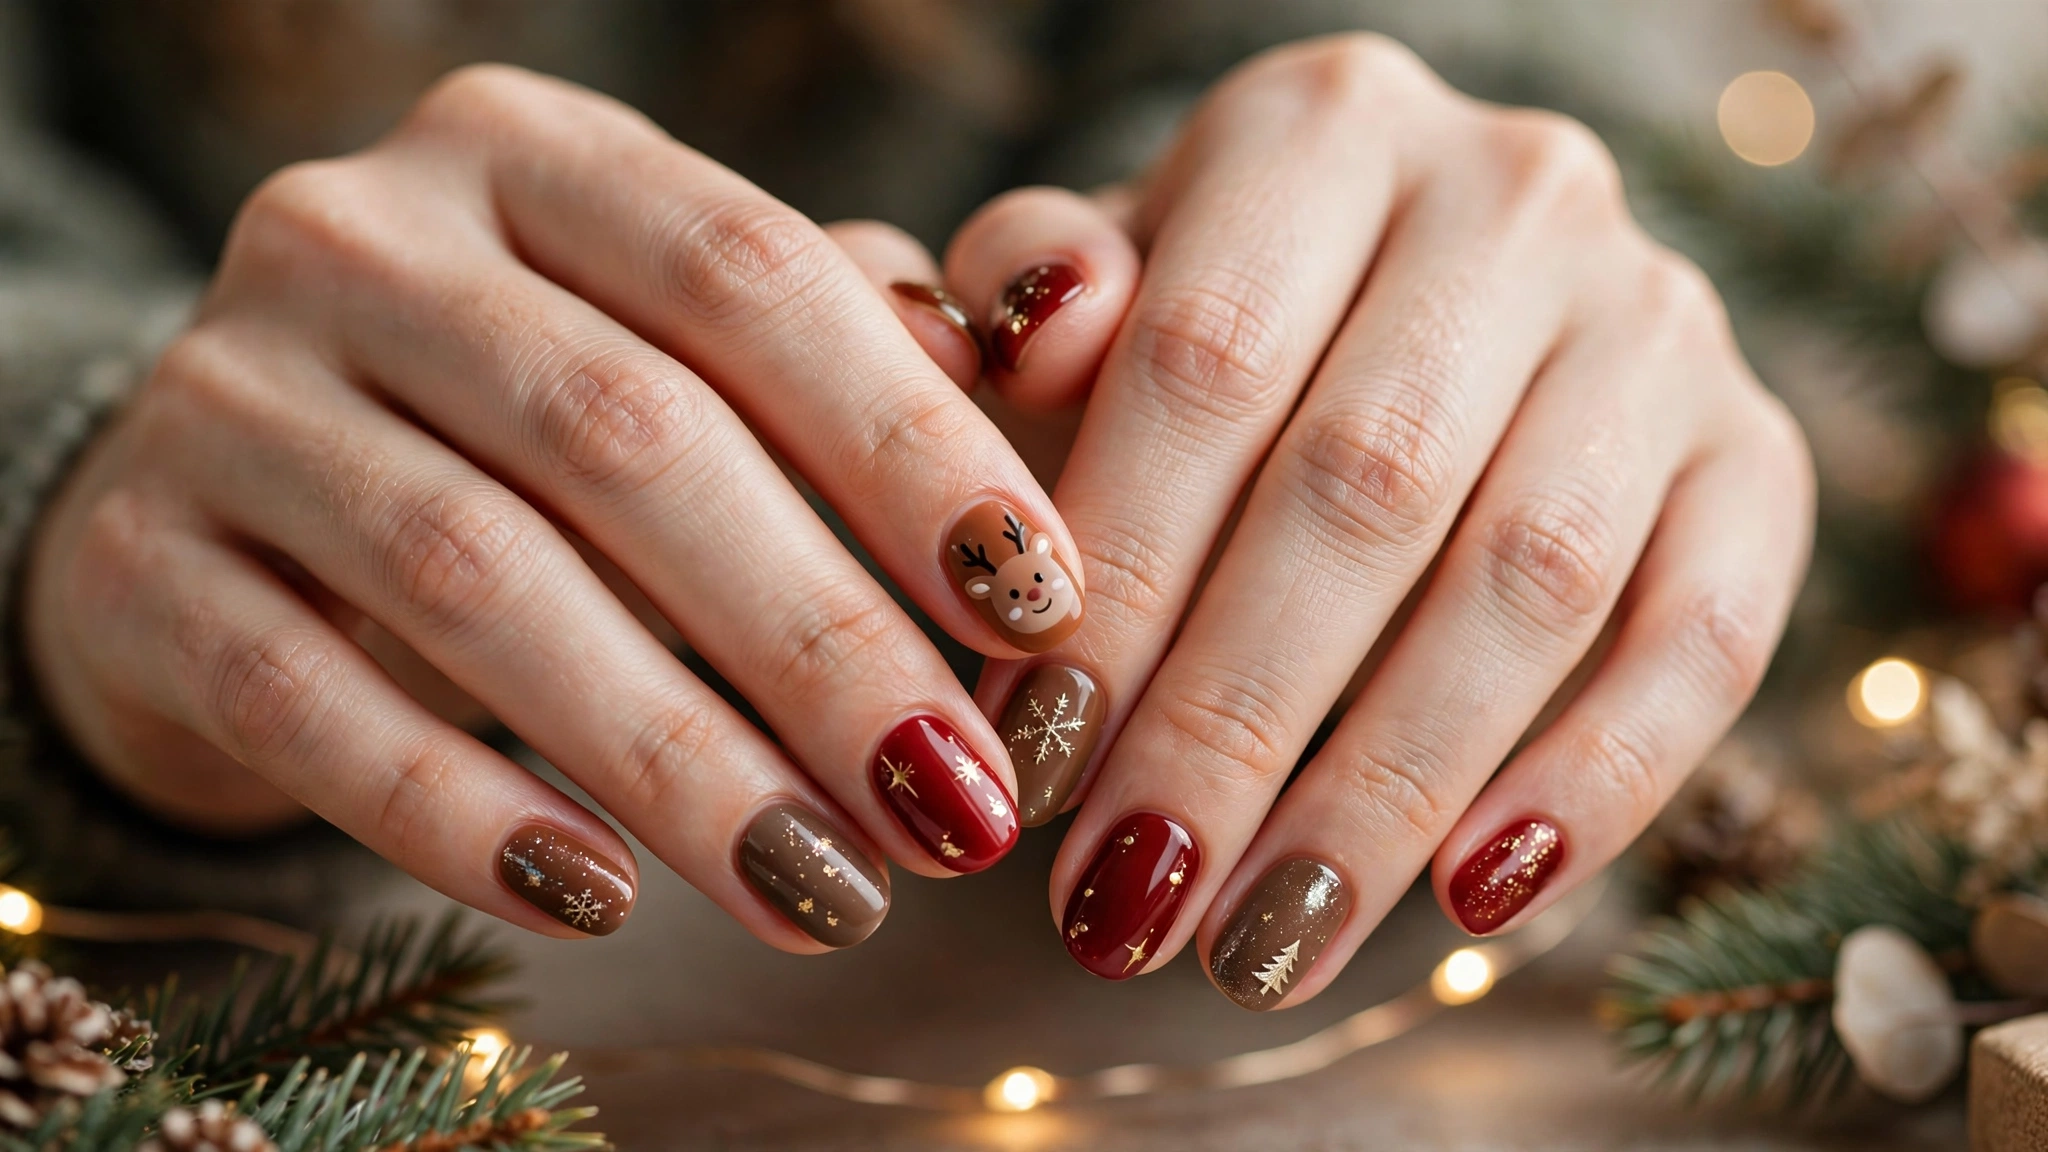
Difficulty: Medium. Time: about 30 minutes. Best nail length: short to medium. Best for: family photos.
Use a warm brown base on the accent nail and deep red on the rest. On the accent nail, draw two small antlers with a thin brush, two dots for eyes, and one red dot for the nose. Keep the face small and near the tip, so it does not cover the whole nail. Add a little gold glitter on the red nails, and leave the reindeer nail free of glitter, so the face stays clear.
9. Santa Hat
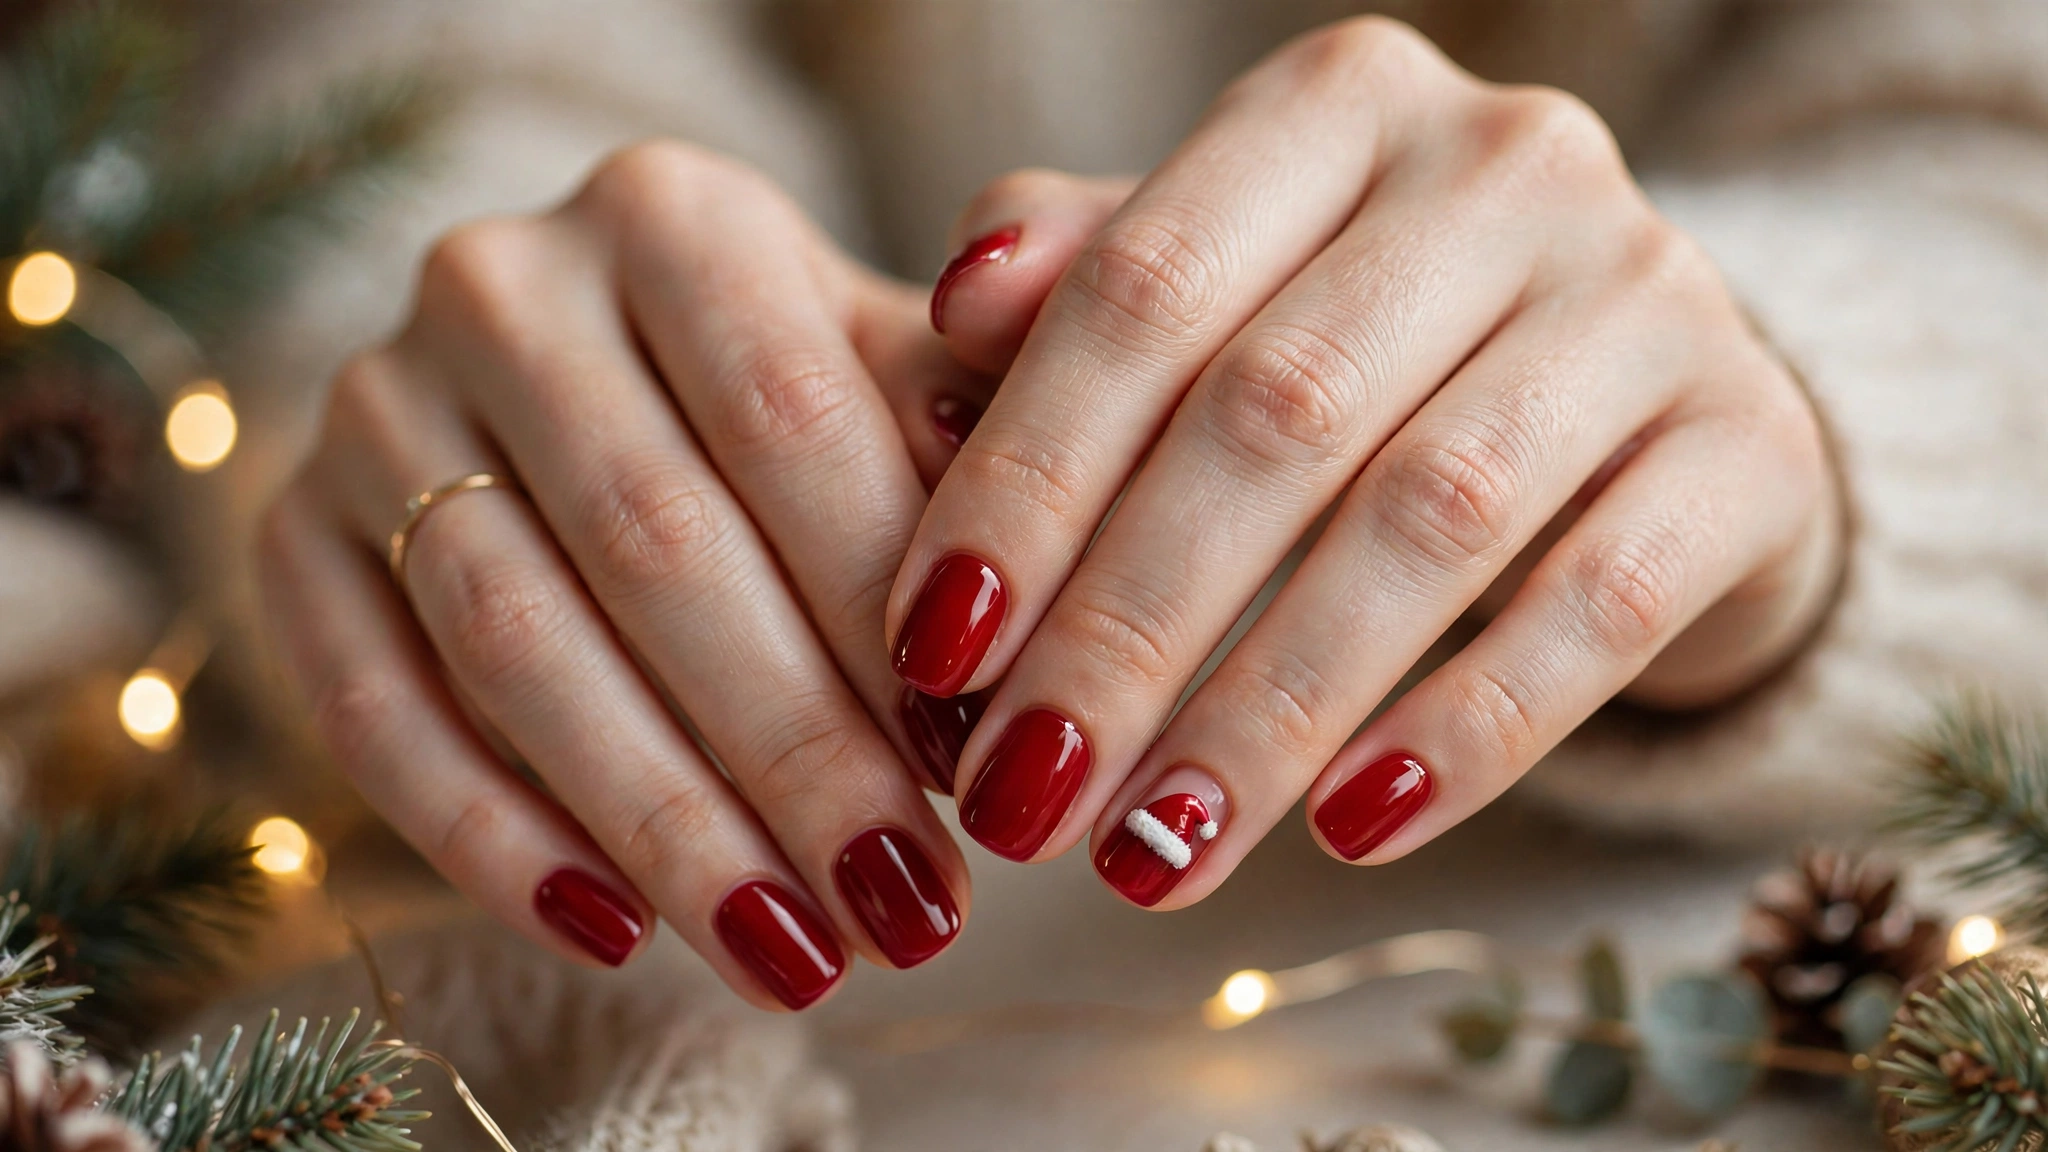
Difficulty: Easy. Time: about 15 minutes. Best nail length: short. Best for: a quick festive look.
Paint all ten nails in glossy red. On the ring finger, paint a small red triangle near the tip, then add a white band across its base and a white dot at the top for the pom pom. If the white band looks thick, use the side of the brush and paint it in one light stroke. The rest of the nails stay plain red, so the hat stands out.
10. Snowman
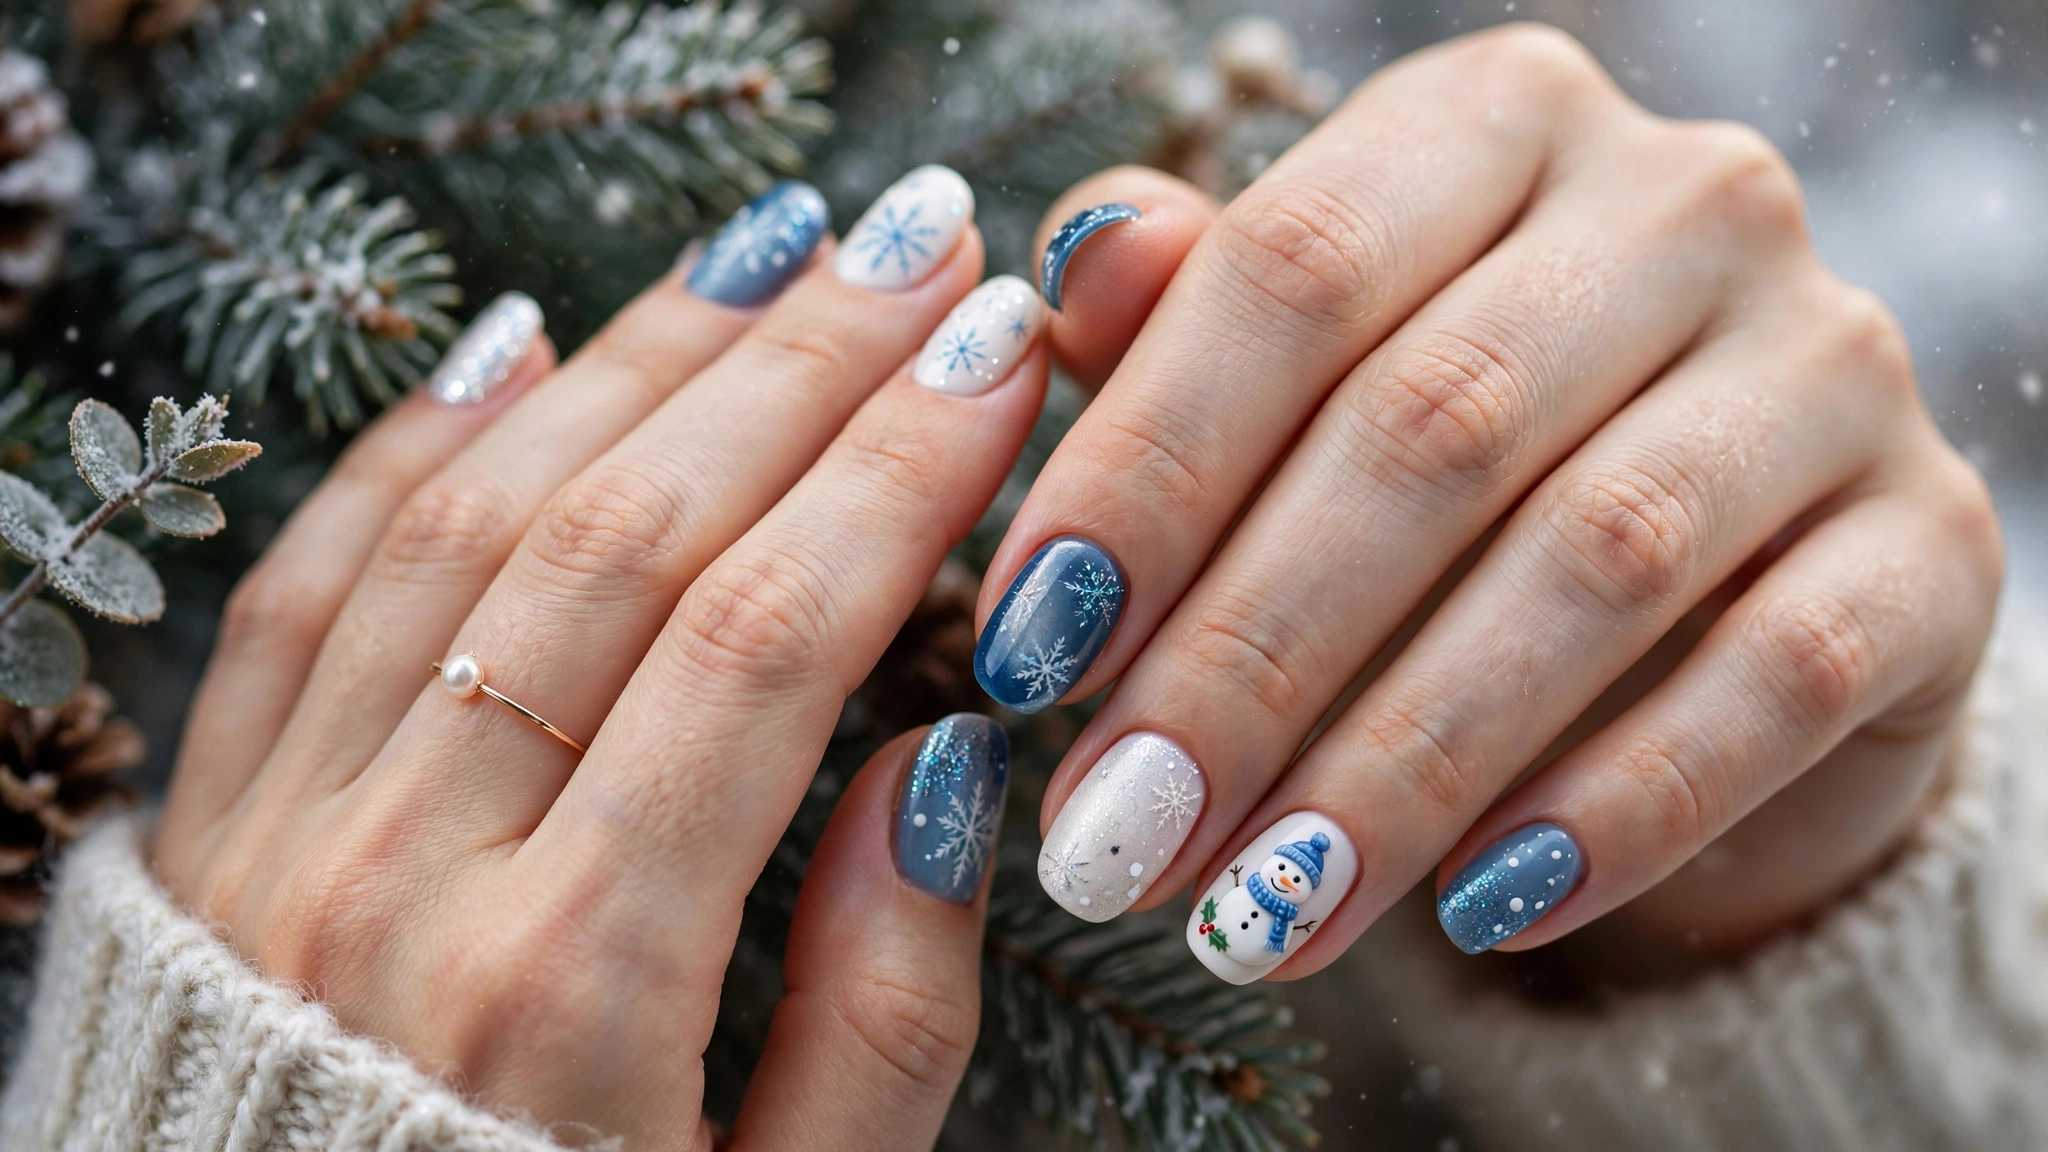
Difficulty: Medium. Time: about 30 minutes. Best nail length: medium. Best for: a winter gathering.
Paint a soft blue base. On the ring finger, paint two white circles, one above the other, for the snowman body and head. Add a tiny blue hat, a thin blue scarf line, and a small orange dot for the nose. Use a dotting tool for the eyes, because a brush makes them too large. Add tiny white dots on the other nails to suggest falling snow.
11. Holly Berries
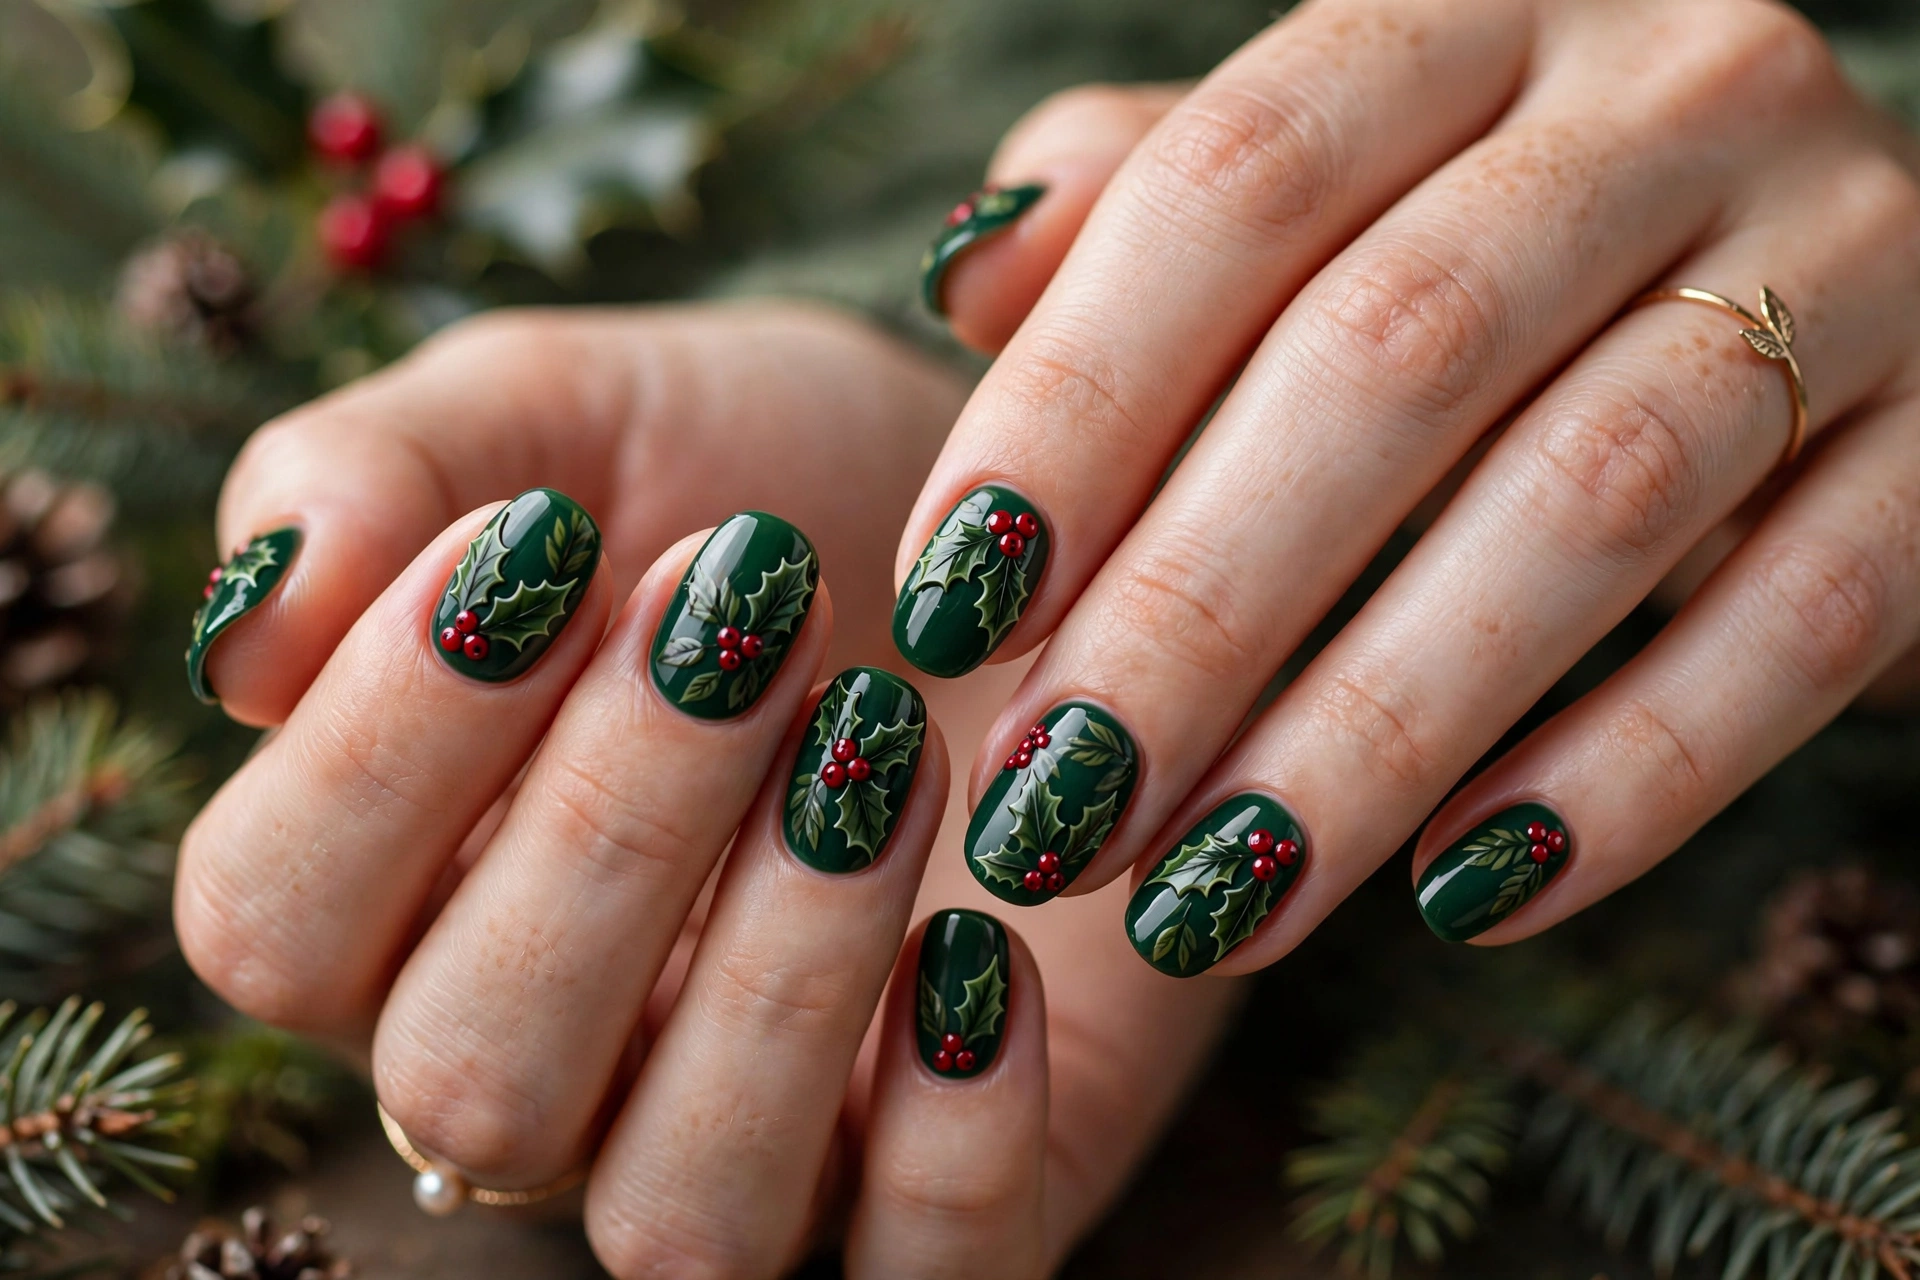
Difficulty: Medium. Time: about 25 minutes. Best nail length: medium. Best for: a traditional Christmas dinner.
Paint a deep green base. On one or two accent nails, draw two small pointed leaves with a thin brush, then add three red dots between them for berries. The leaves should point in different directions, or the design looks flat. Keep the other nails plain green. This one suits a green or red outfit, and it needs no glitter at all.
12. Red Plaid
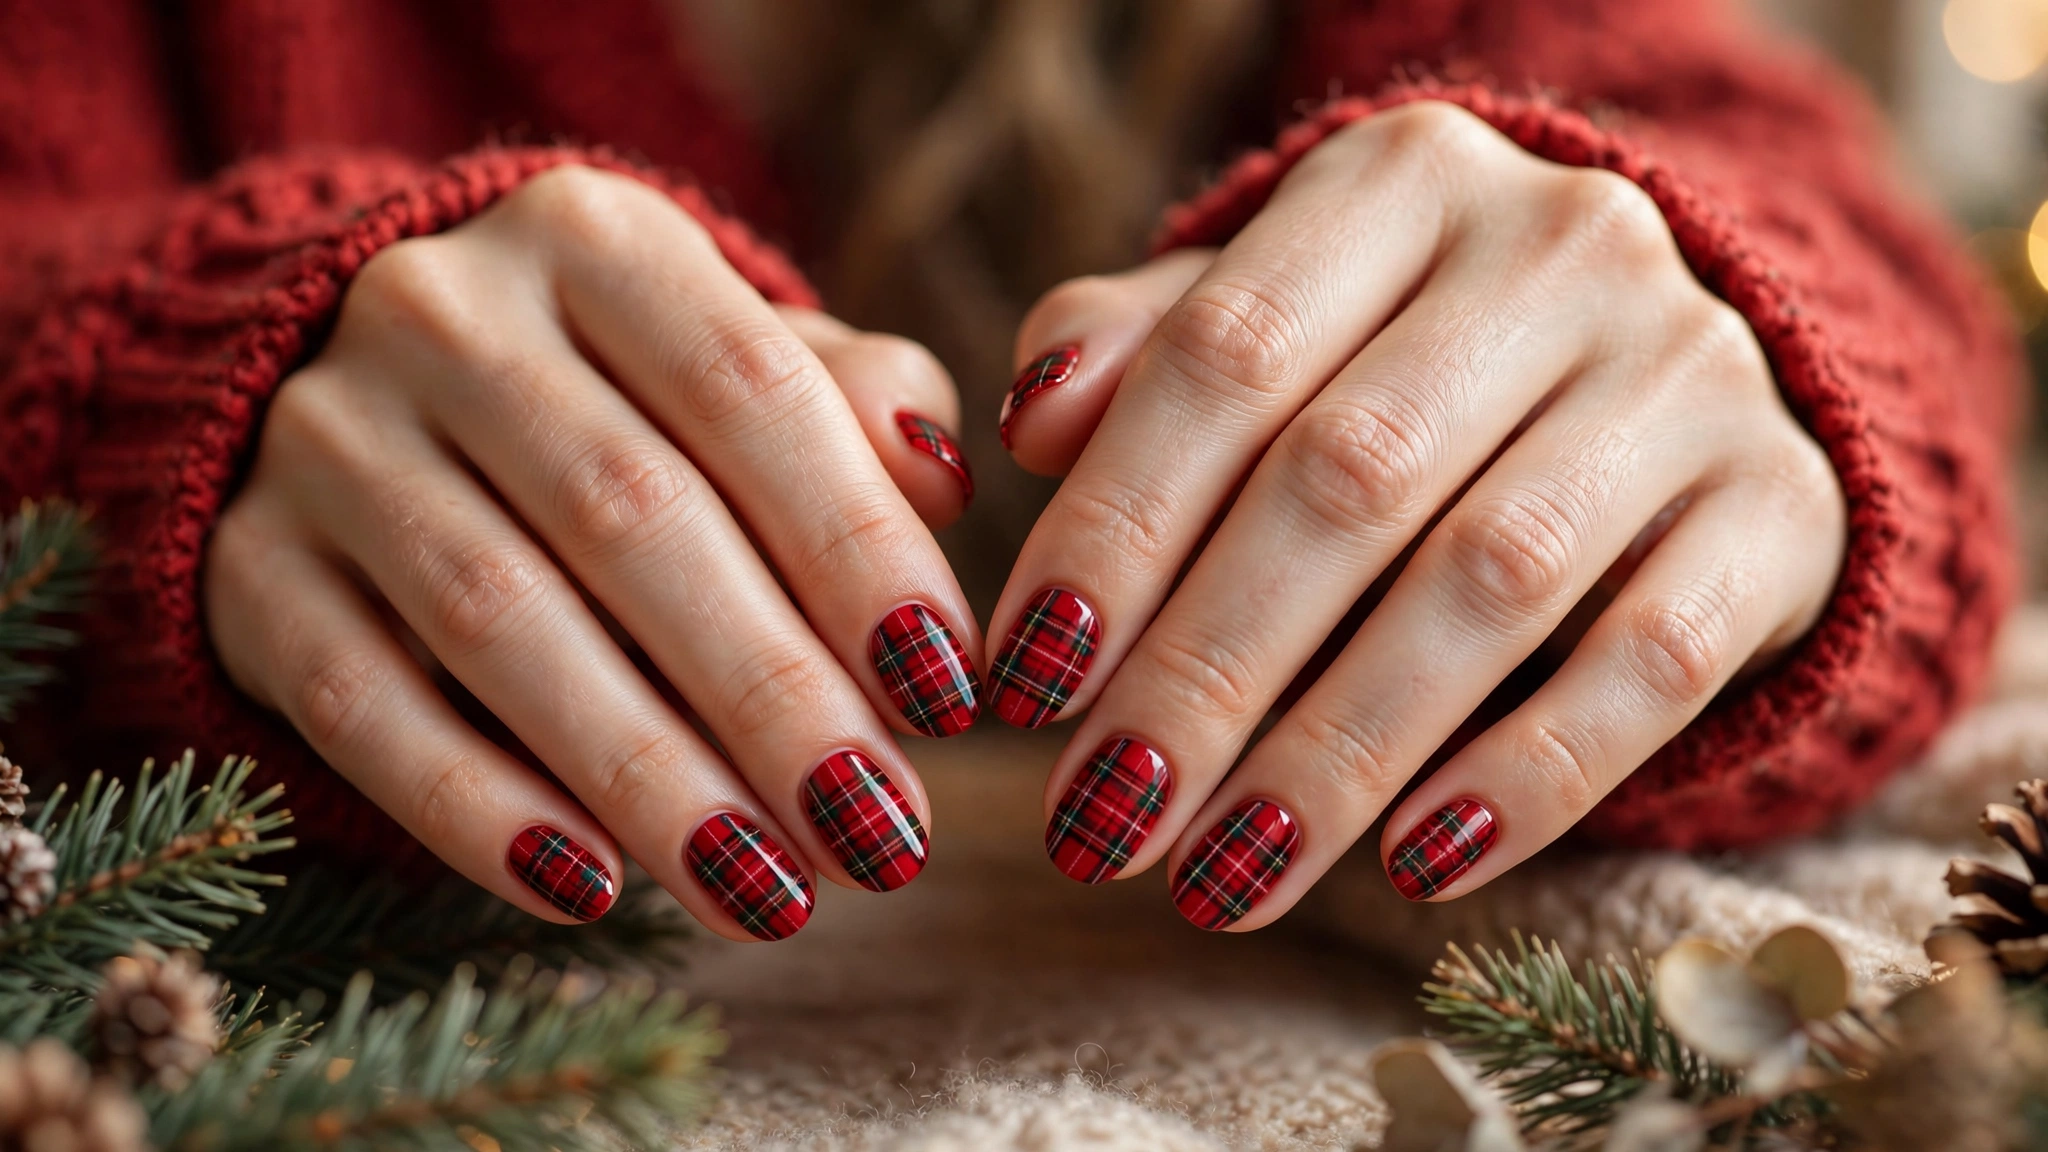
Difficulty: Advanced. Time: about 35 minutes. Best nail length: medium to long. Best for: a cosy family Christmas.
Paint a red base and let it dry fully. Draw thin black lines across and down each nail, then add one thin green line and one thin white line in the same directions. The lines must be thin, or the pattern turns into a block of colour. Try plaid on two accent nails first. If you like it, repeat it on the rest. If not, keep the rest plain red.
13. Burgundy Velvet
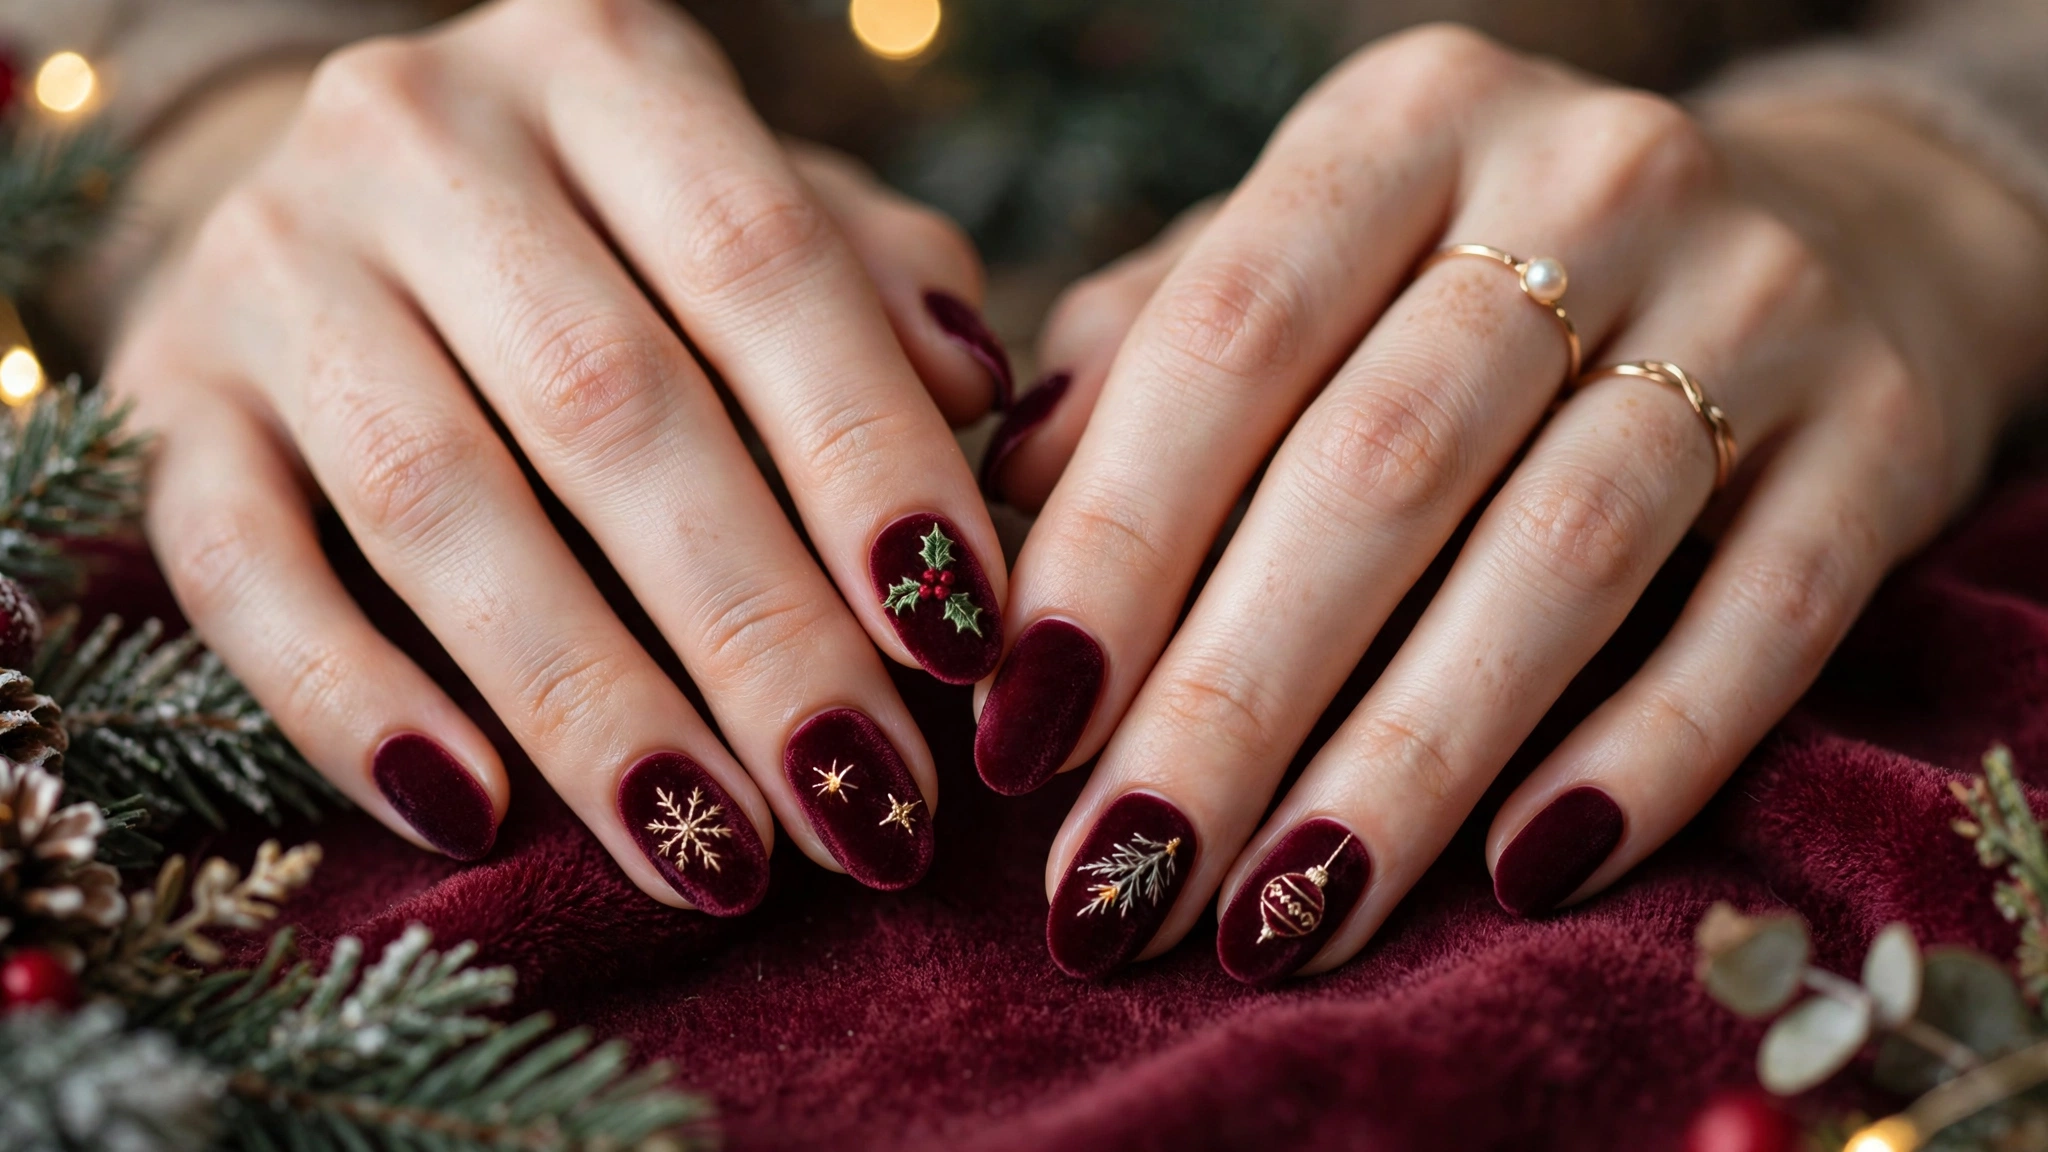
Difficulty: Easy. Time: about 15 minutes. Best nail length: short to medium. Best for: a Christmas dinner.
Use a deep burgundy polish with a matte finish. Paint two thin coats and let them dry, then add one tiny gold snowflake on the ring finger. Do not add top coat over the whole nail, or you will lose the soft velvet look. If you want a little shine, add top coat only on the snowflake. This shade suits a burgundy or black dress.
14. Emerald Glitter

Difficulty: Easy. Time: about 20 minutes. Best nail length: medium. Best for: a party evening.
Paint a deep green base, then press emerald glitter onto two accent nails only. On the other nails, keep the green plain and glossy, so the glitter has something calm to sit next to. A useful tip is to use a sponge to press the glitter on, because a brush spreads it too thin. Add one small gold dot on each glitter nail, and stop there.
15. Rose Gold
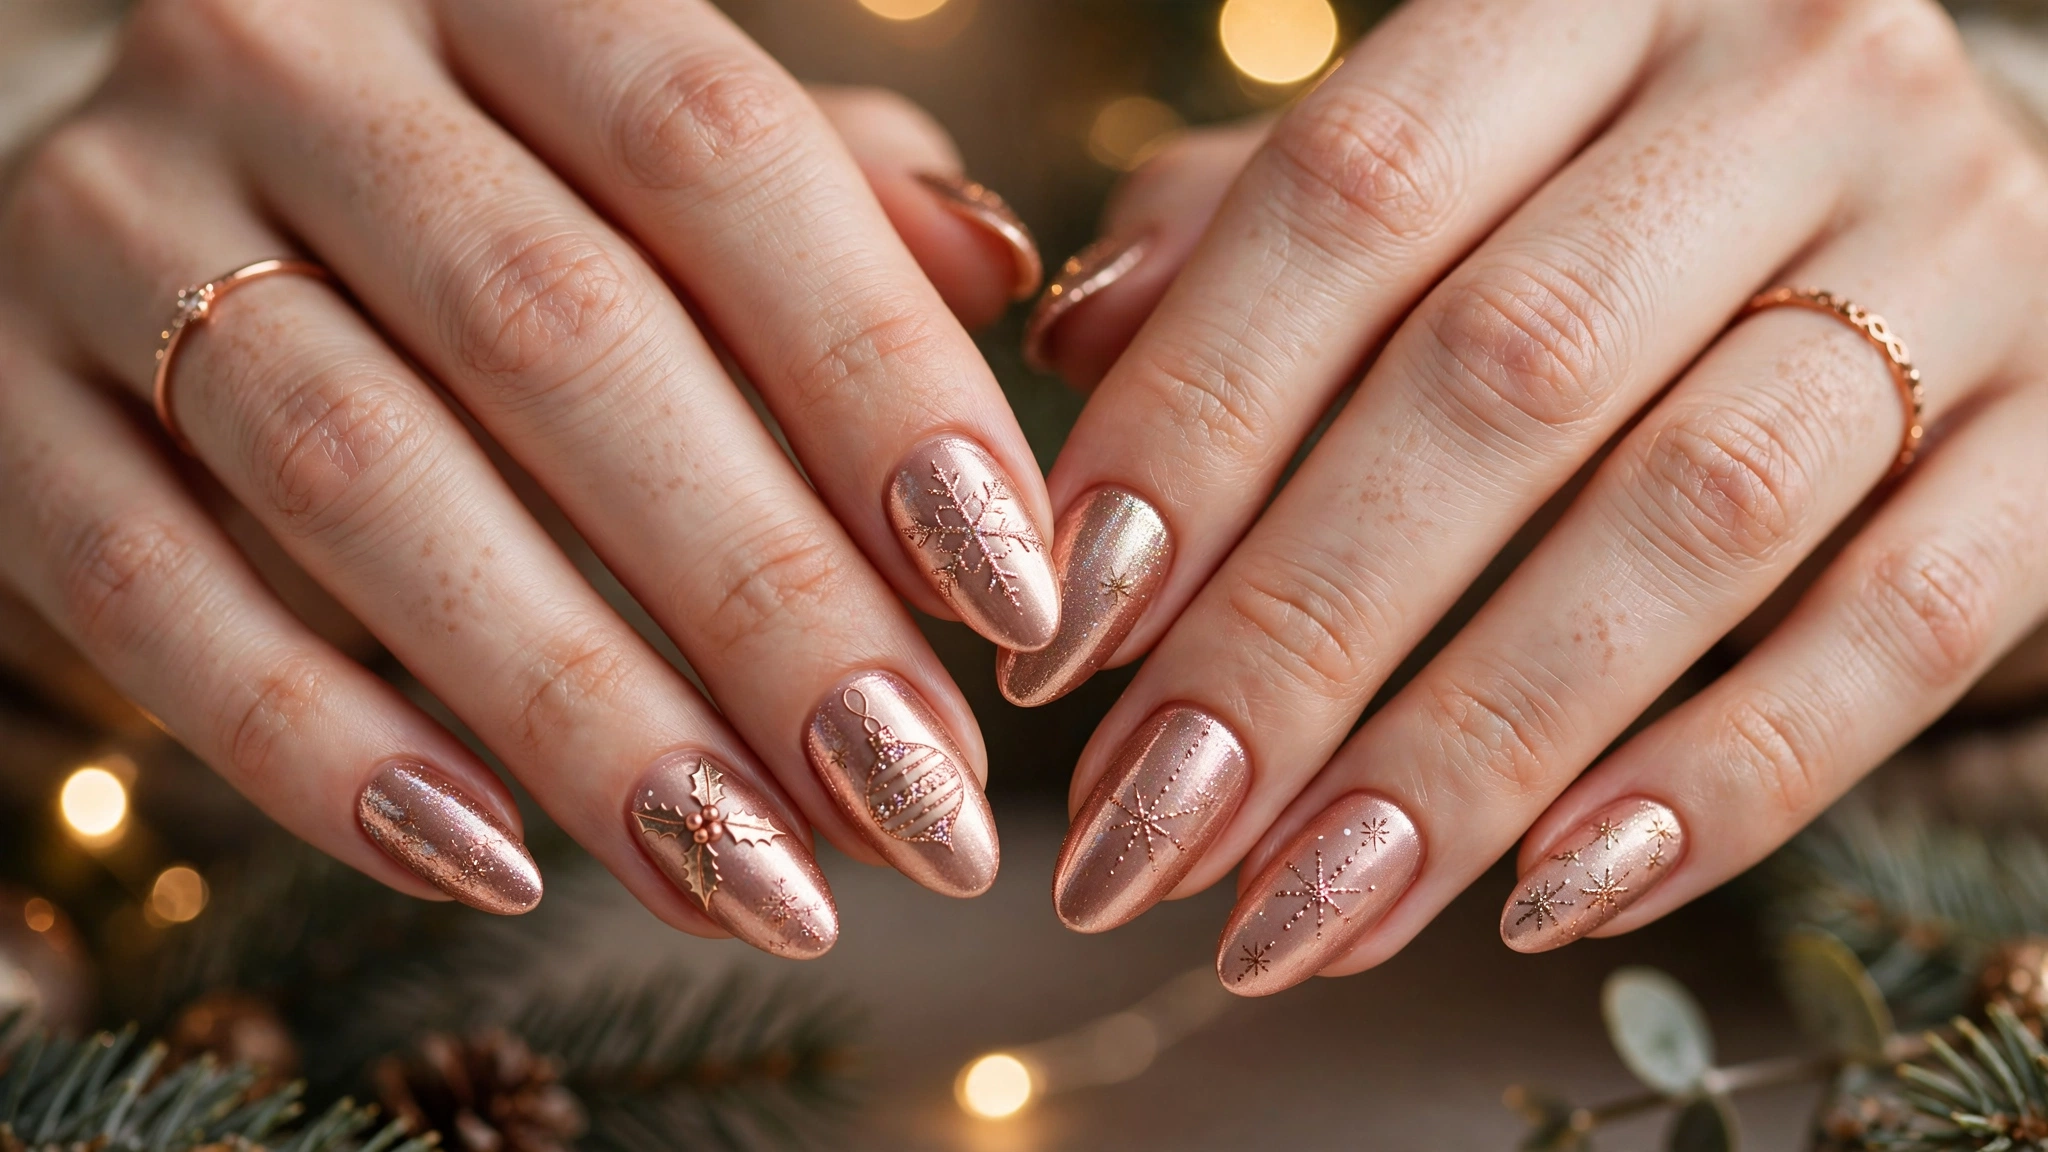
Difficulty: Easy. Time: about 15 minutes. Best nail length: any length. Best for: photos in warm light.
Paint a shimmering rose gold base on all ten nails. On the ring finger, add one small white snowflake or a tiny gold bauble dot. The metal shine does most of the work here, so keep the art to one nail. This design suits a pink, cream, or gold outfit. Avoid heavy glitter, because it fights with the rose gold finish.
16. Frosted Blue
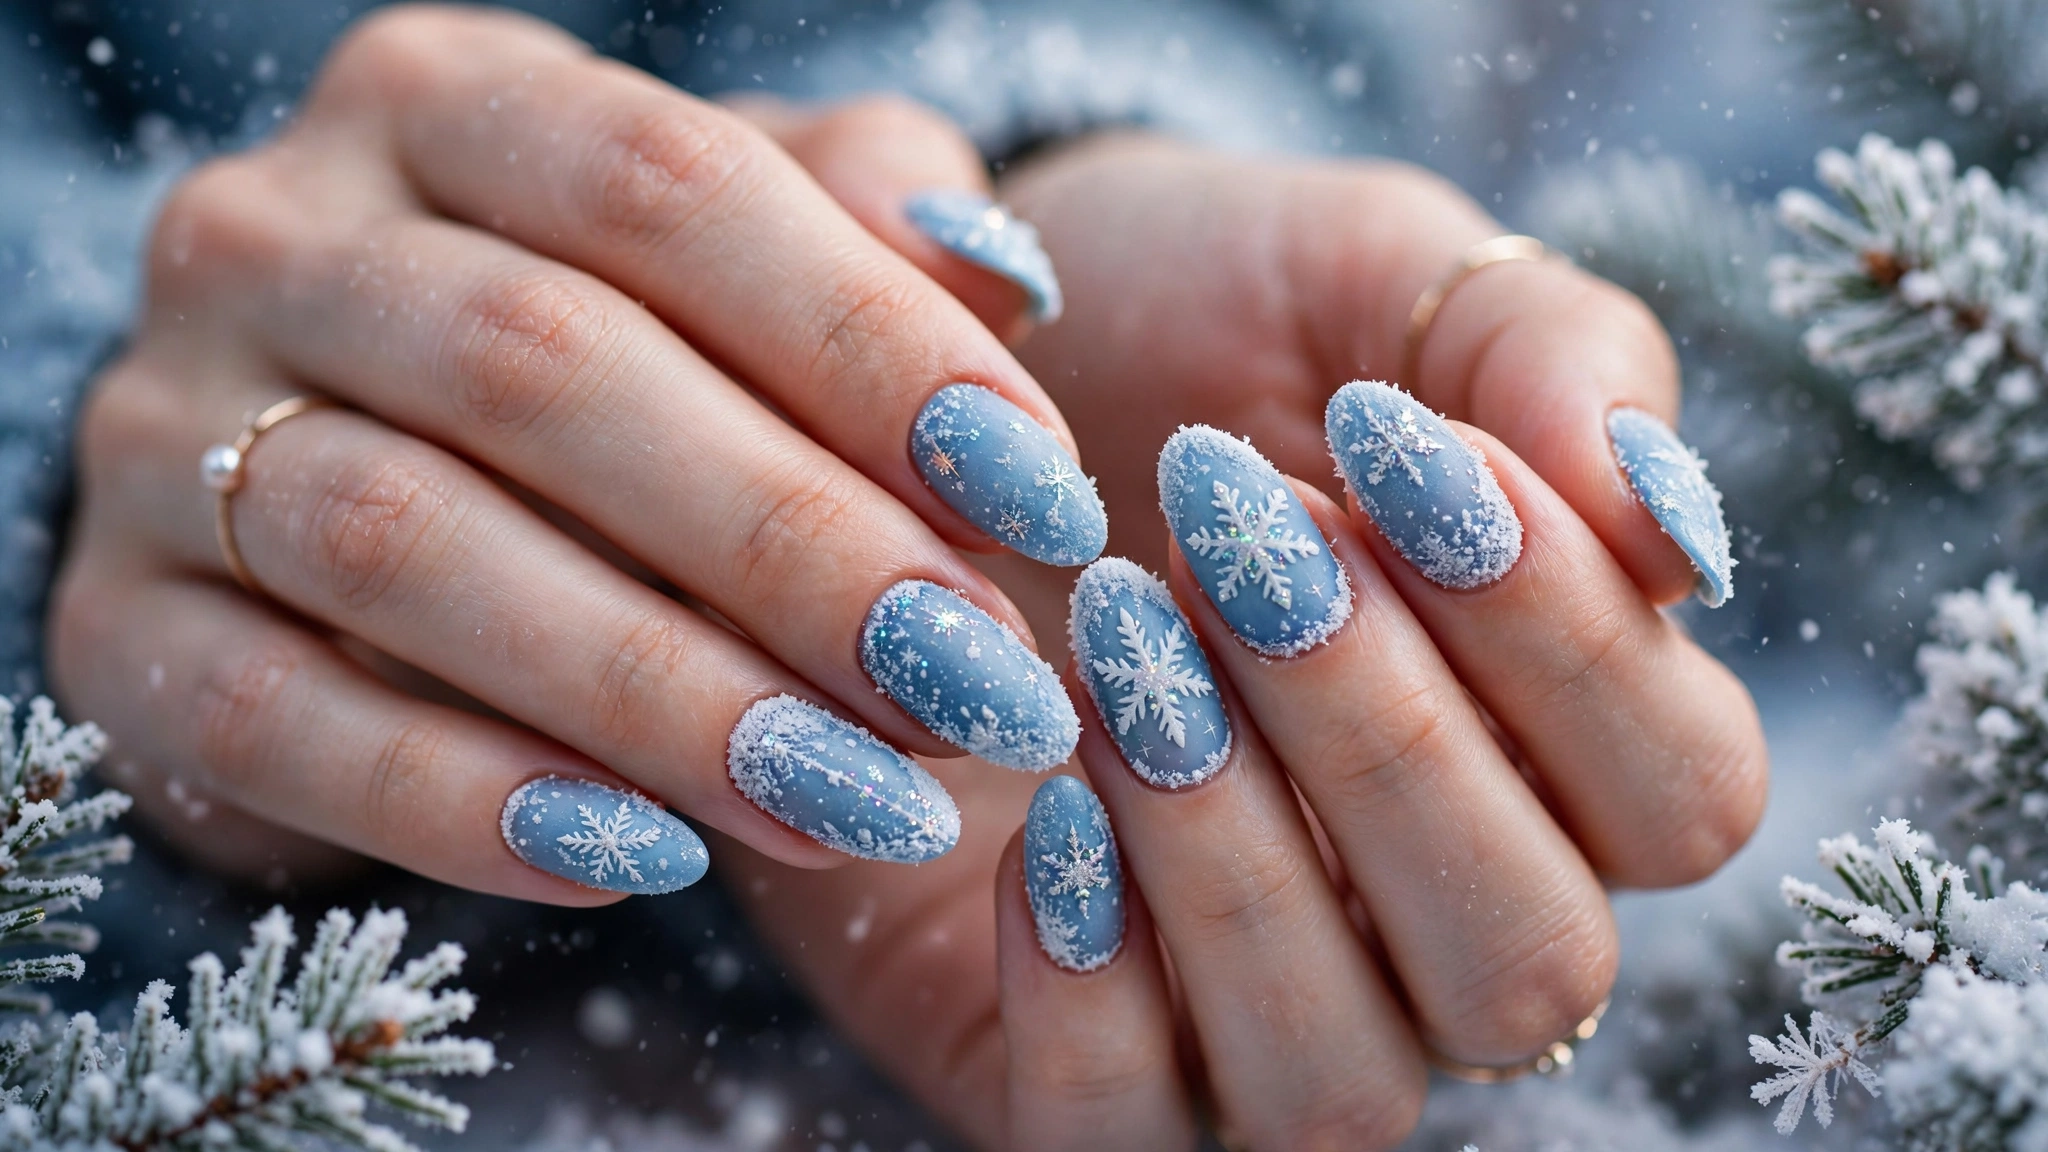
Difficulty: Medium. Time: about 25 minutes. Best nail length: short to medium. Best for: a calm winter look.
Paint an icy blue base with a sugary, textured finish. When it is dry, draw white snowflakes on one or two accent nails with a thin brush. Keep the snowflakes small, because large ones hide the frosted texture. Add a little white sparkle at the tips only. This design suits a blue or white winter outfit.
17. Gingerbread
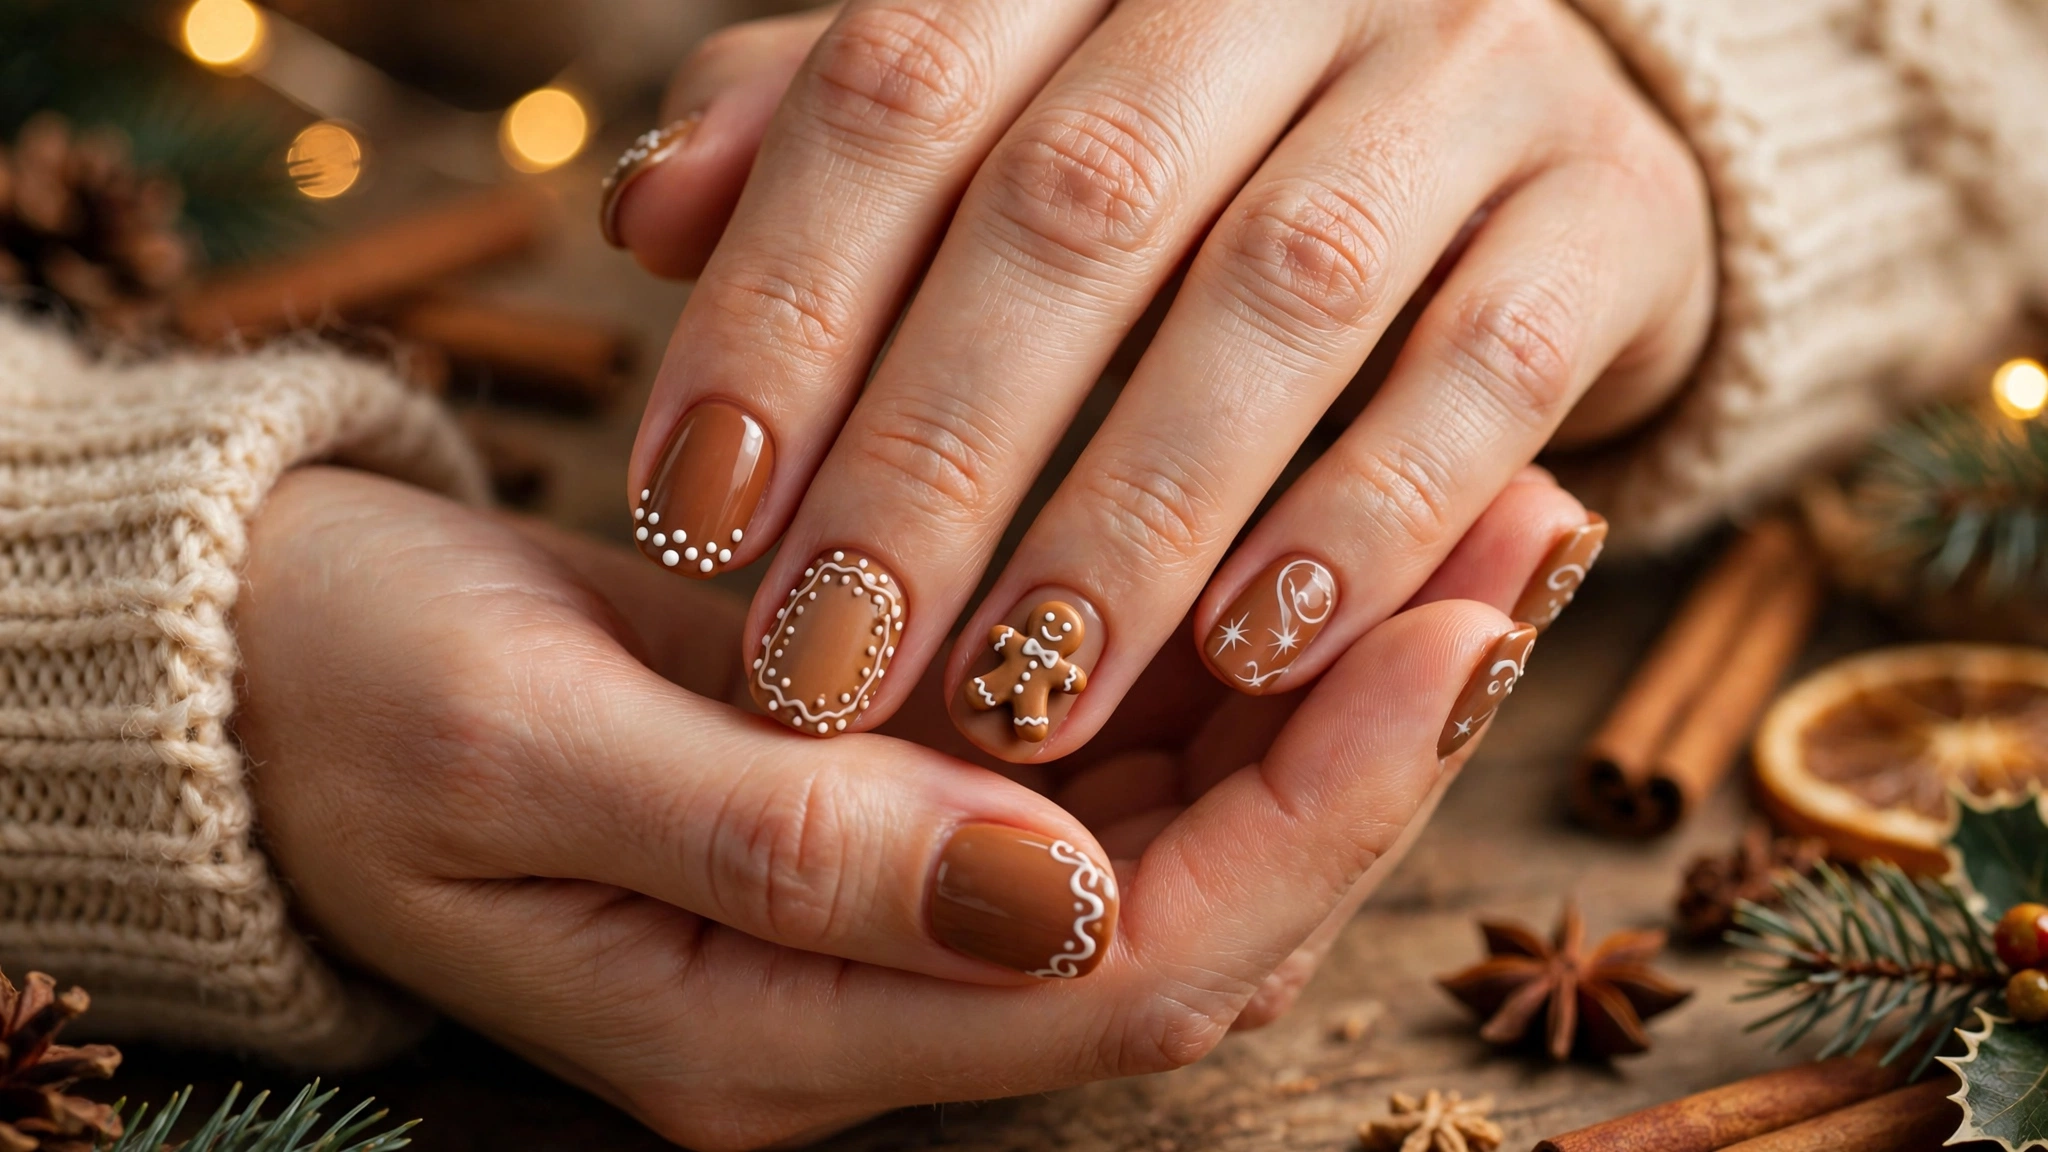
Difficulty: Medium. Time: about 30 minutes. Best nail length: medium. Best for: baking day at home.
Paint a warm gingerbread brown base. On the ring finger, draw a small gingerbread man with a round head and body, using white dots for icing. Use a dotting tool for the buttons, because a brush makes them uneven. On the other nails, add one white swirl near the tip to suggest icing. This design looks best with a cosy sweater, not a formal dress.
18. Ornament Baubles
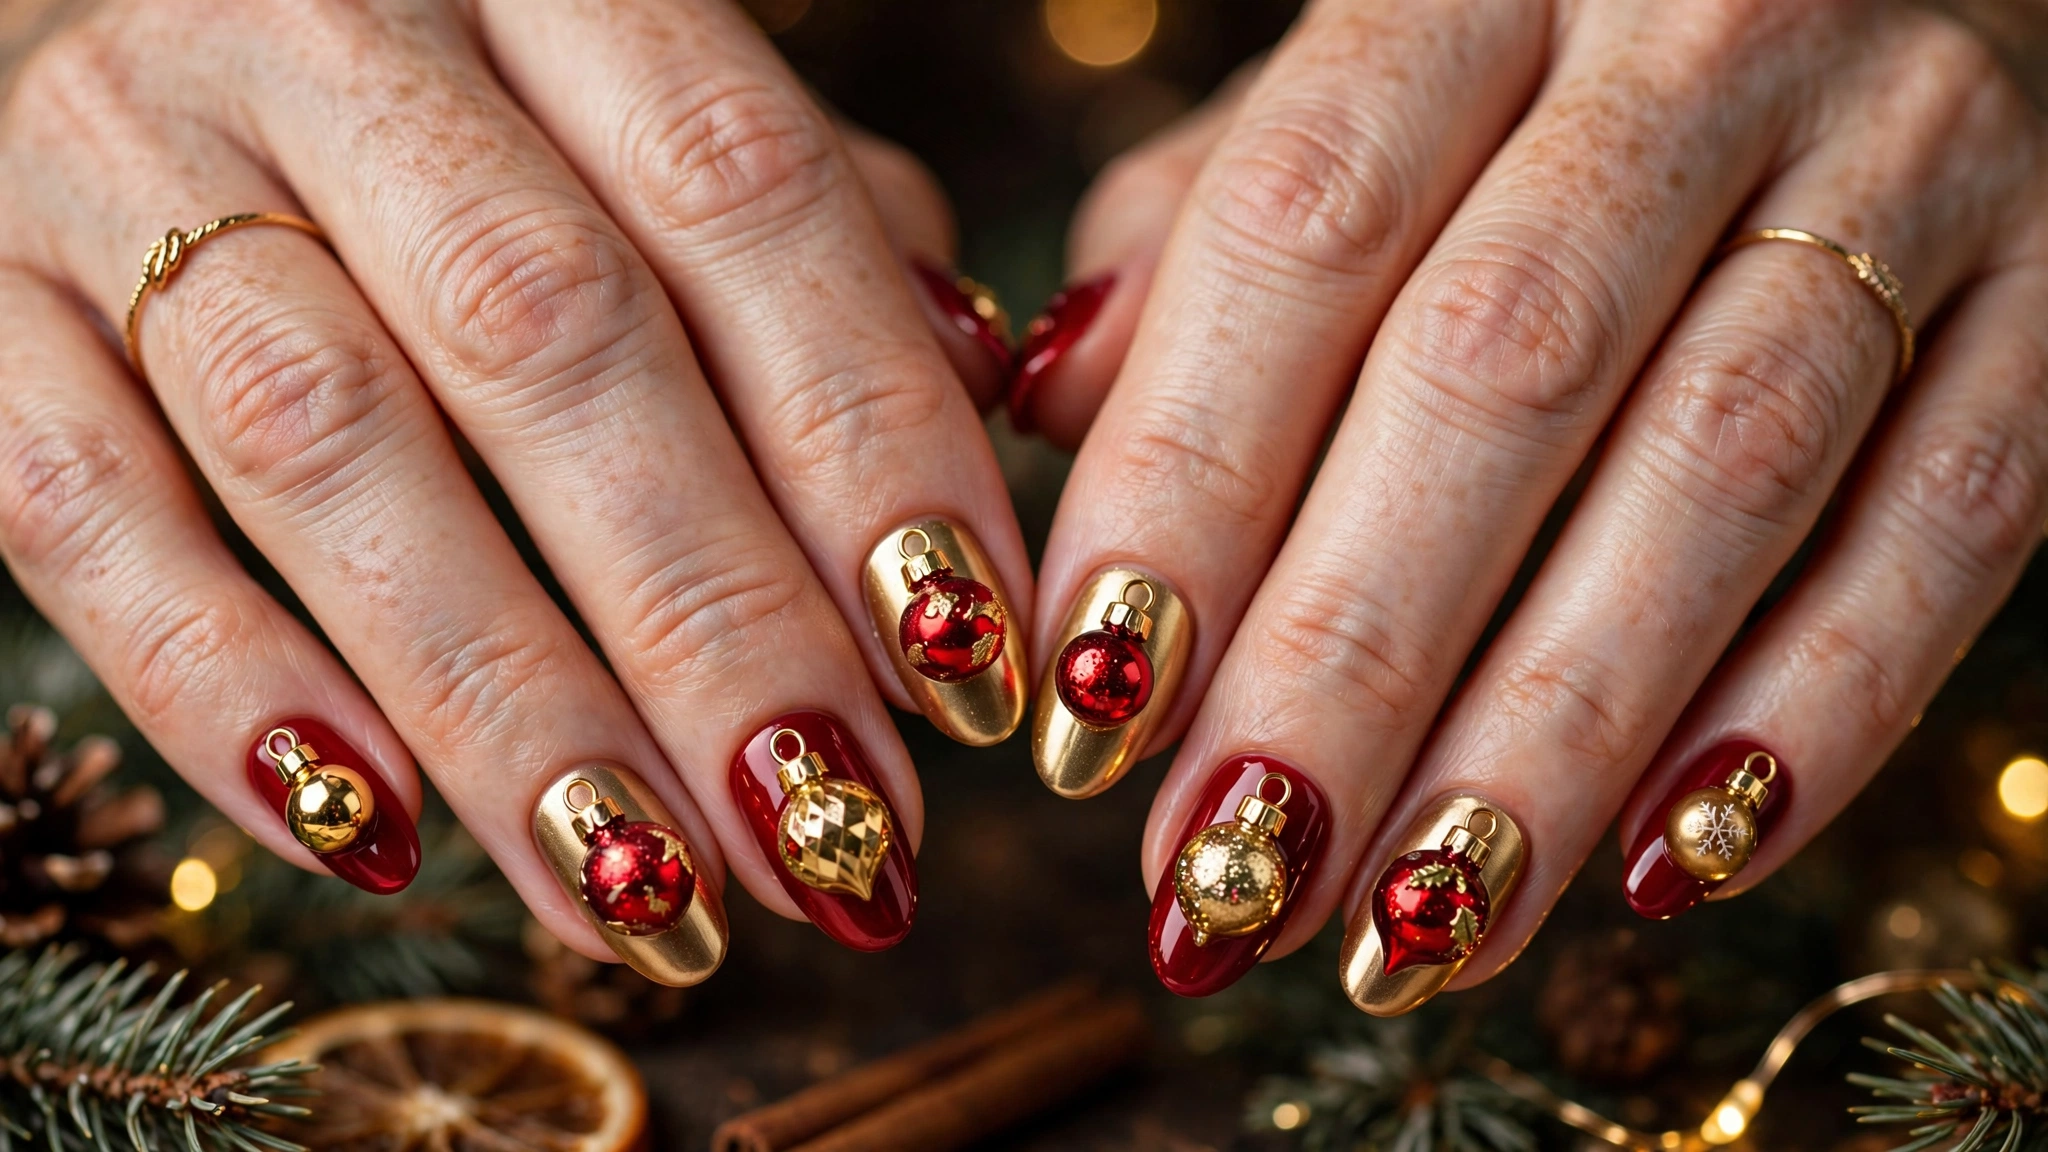
Difficulty: Advanced. Time: about 35 minutes. Best nail length: medium to long. Best for: a Christmas party.
Paint a red base on most nails and gold on two accent nails. On the gold nails, draw a round bauble shape in red, with a small gold loop at the top and a white curved line to suggest shine. The white line is what makes the bauble look round, so keep it thin and curved. Keep the red nails plain, so the baubles stand out.
19. Mistletoe
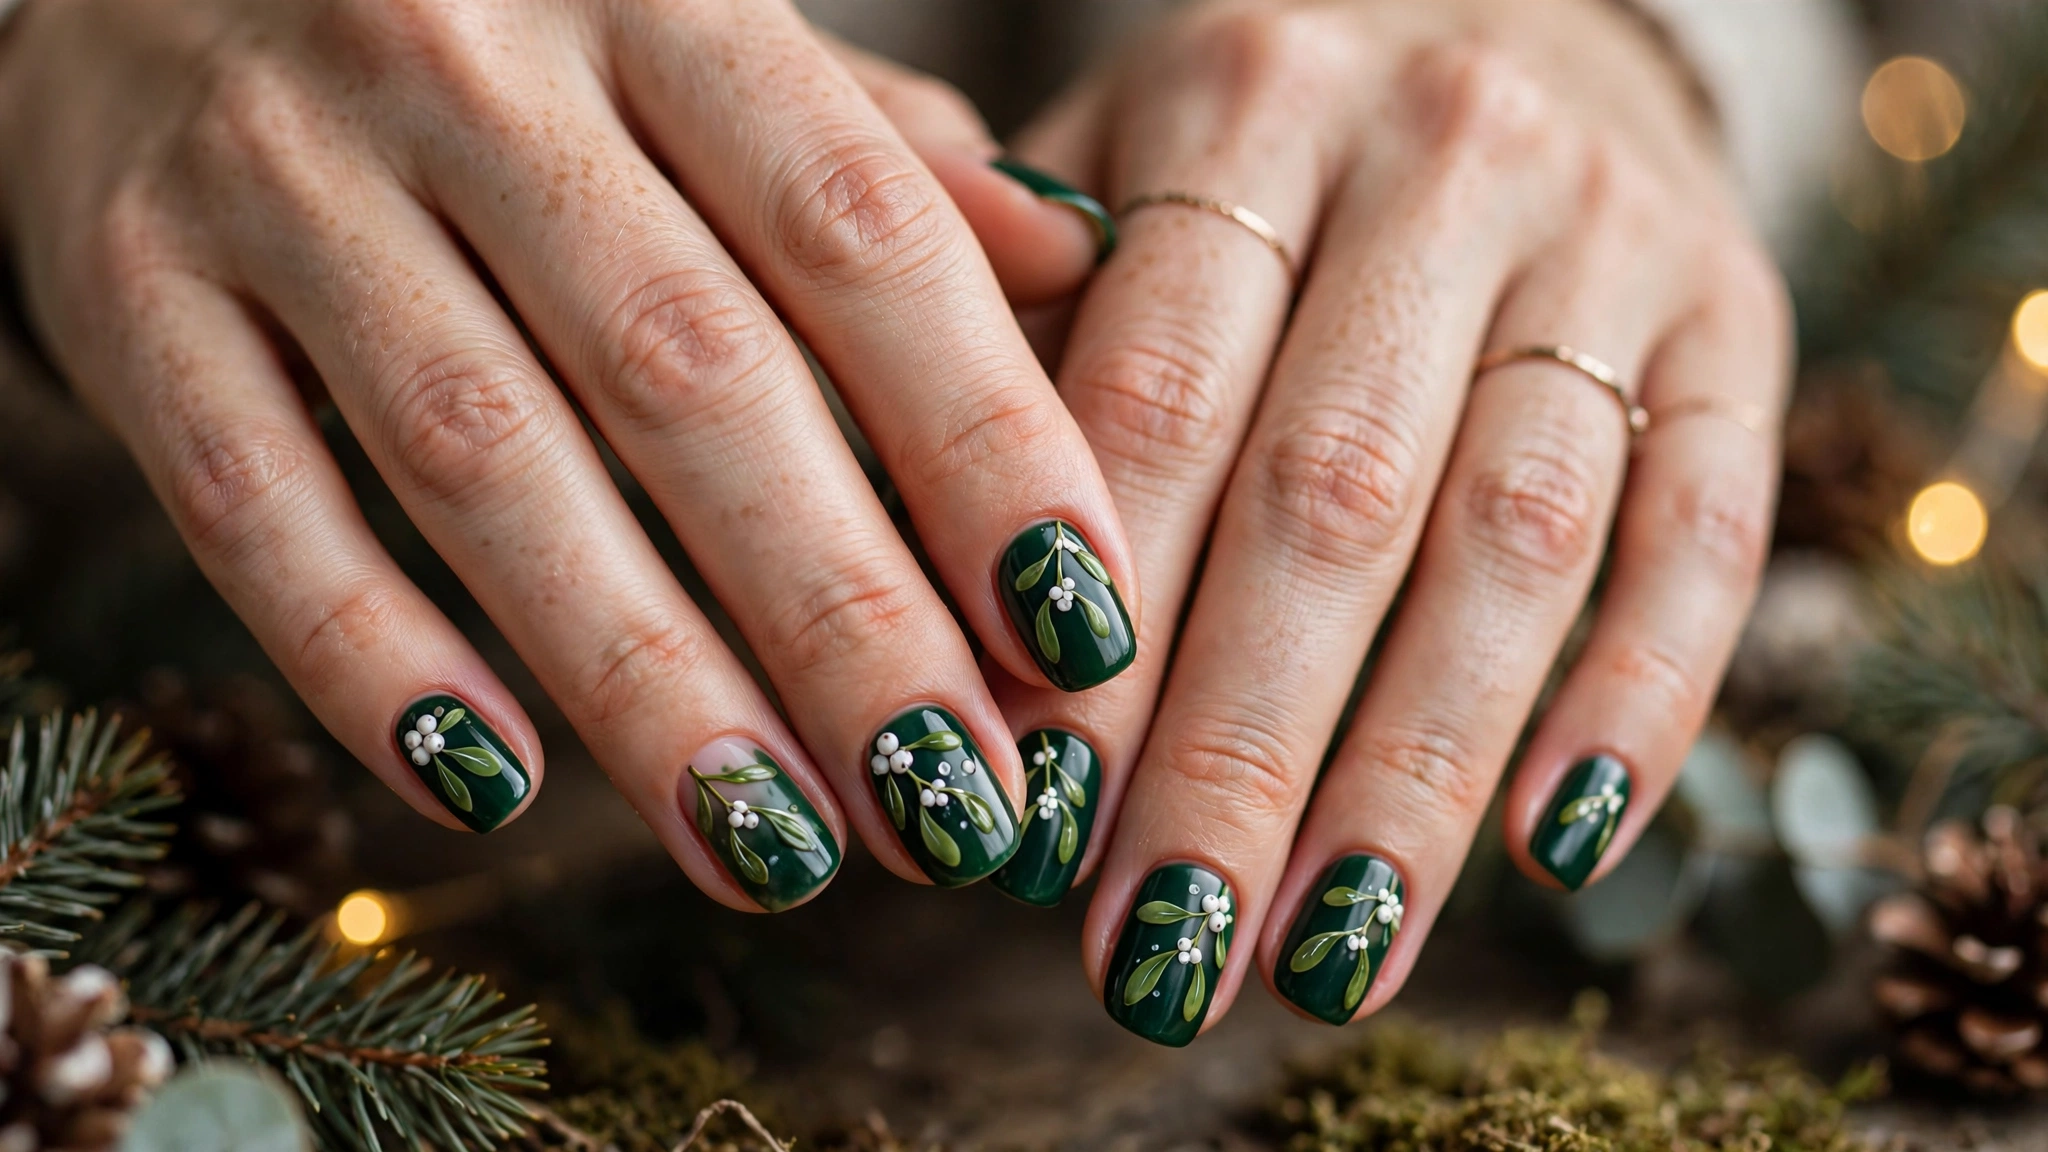
Difficulty: Medium. Time: about 25 minutes. Best nail length: medium. Best for: a Christmas date night.
Paint a deep green base. On one or two accent nails, draw small mistletoe leaves with a thin brush, then add three white dots for berries. The berries should sit in a small cluster, not in a straight line, or they look like snow. Keep the other nails plain green and glossy. This one suits a green or red outfit.
20. Nude with Gold Stars

Difficulty: Easy. Time: about 10 minutes. Best nail length: any length, including short nails. Best for: any occasion.
Paint a soft nude base on all ten nails. Add one tiny gold star on each nail, or on two accent nails only if you want a quieter look. Use a dotting tool or a small star sticker, because hand drawn stars are hard to keep the same size. The nude base makes the gold stand out, and the look suits every outfit. If you are short on time, start here.
Common mistakes to avoid
- Painting a different design on every nail. One design per manicure is enough. Too many designs together usually look messy.
- Skipping the base coat. A base coat protects your nails and stops dark colours from staining them.
- Using thick coats of polish. Two thin coats dry faster and last longer than one thick coat.
- Adding glitter to every nail. Glitter on one or two accent nails looks elegant. Glitter on all ten nails can look heavy.
- Forgetting a top coat. A clear top coat adds shine, protects the design, and helps your manicure last longer. Use a matte top coat only when the design needs a matte finish, such as burgundy velvet.
Conclusion
You do not need all 20 designs. Pick one that fits your outfit, your nail length, and your plans, and copy it step by step. Start with a base coat, add your two colours, keep one accent nail, and finish with a clear top coat. Whether you choose classic red, green and gold, a cute reindeer, a cosy plaid, or a simple nude with gold stars, one clear design done well looks better than three designs rushed.
Save this list, choose your design today, and try your favourite idea this weekend.
Frequently asked questions
1. What are the best christmas nail designs for short nails?
Classic red, nude with gold stars, gold French tips, and a Santa hat accent are good choices for short nails, because they are simple and do not need a lot of space. Keep the design on one accent nail and leave the rest plain.
2. Which Christmas nail colours are popular this season?
Classic red, burgundy, emerald green, rose gold, frosted blue, and green and gold are popular choices this season. Pick the one that matches your outfit, not just the colour you see most often.
3. How long do Christmas nail designs last?
A manicure with a base coat and a top coat usually lasts 5 to 7 days. Gel polish lasts longer, about 2 to 3 weeks. Avoid hot water and harsh cleaning products to help your design last longer.
4. Can I do Christmas nail art at home without tools?
Yes, you can. Use a toothpick or a bobby pin for dots, a thin brush or a pen for lines, and stickers or nail stamps for snowflakes, stars, and trees. Start with a simple design, such as nude with gold stars, before trying a detailed one.
5. What nail shape is best for Christmas nail designs?
Almond and oval shapes suit most designs, because they give enough space for art and look elegant. Square shapes suit simple designs such as classic red and plaid. Short round nails suit simple designs such as gold French tips and nude with gold stars.